
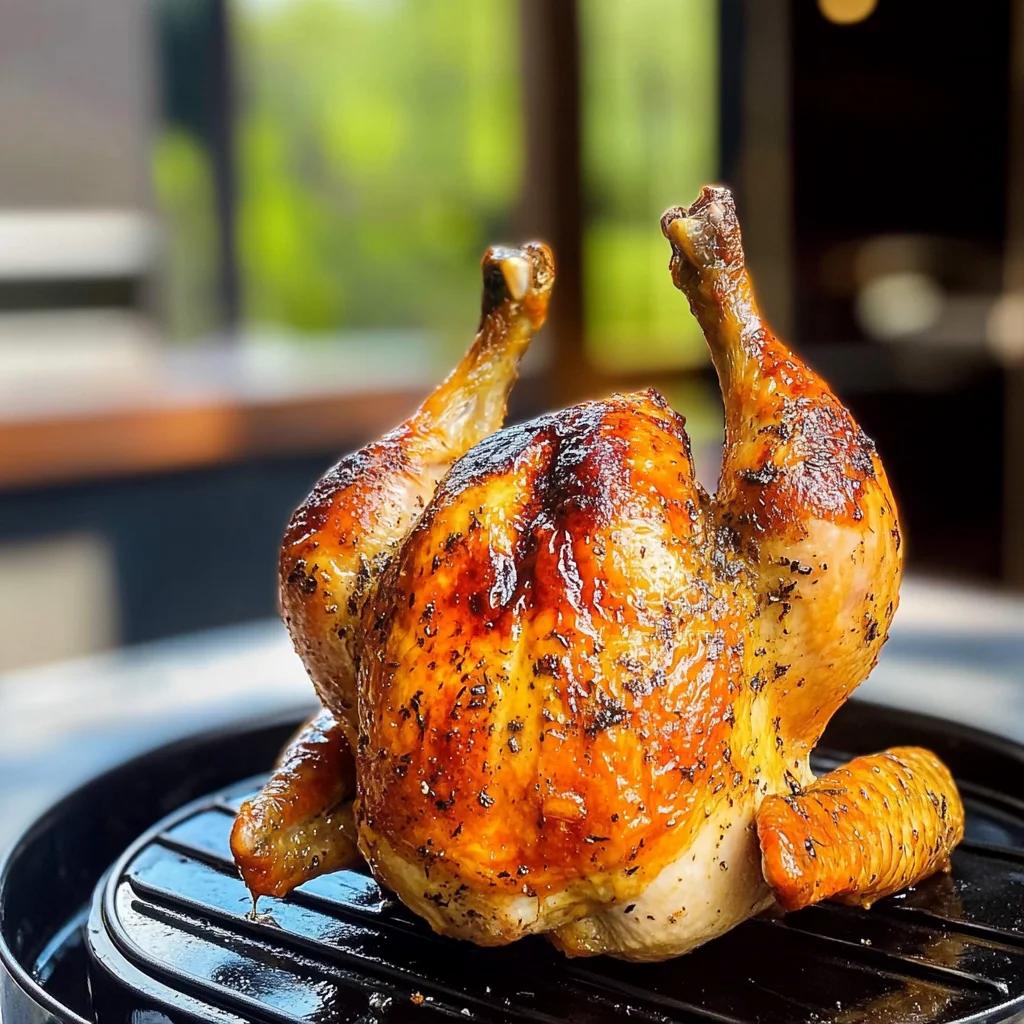
Imagine the irresistible aroma of a perfectly roasted chicken, its skin golden and crispy, with hints of herbs and spices wafting through the air. The unique method of Beer Can Chicken brings an explosion of flavors that tantalize your taste buds, making every bite a delightful experience that’s both juicy and tender.
This dish not only promises an amazing flavor adventure but also evokes memories of backyard barbecues filled with laughter and good company. Whether you’re firing up the grill for a summer gathering or enjoying a cozy evening with friends, Beer Can Chicken is the star that will elevate any occasion and leave everyone craving more.
Chef’s Note (Updated): Use an instant-read meat thermometer inserted into the thickest part of the thigh (away from the bone) to verify an internal temp of 165°F before resting and carving.
Why Is Beer Can Chicken So Irresistibly Good?
Juicy Flavor: The upright roasting method allows the chicken to absorb moisture from the beer, resulting in perfectly tender and flavorful meat.
Effortless Preparation: With just 15 minutes of prep time, you can have a gourmet meal on the table without hours of fuss.
Crowd-Pleaser: Impress friends and family with this show-stopping dish that’s sure to be a hit at any gathering!
Versatile Seasoning: Customize the seasoning to match your taste—whether you prefer smoky, spicy, or savory notes.
Perfectly Cooked: Enjoy evenly cooked chicken every time, thanks to the unique cooking method that promotes even heat distribution.
Ingredients for Beer Can Chicken
For the Chicken
- 1 whole whole chicken (about 4-5 pounds) – For best results, choose a fresh chicken for maximum juiciness and flavor.
For the Seasoning
- 2 tablespoons olive oil – This helps the seasoning adhere to the chicken and adds a rich flavor.
- 1 tablespoon paprika (smoked or regular) – Paprika adds a beautiful color and a hint of smokiness to the dish.
- 1 tablespoon garlic powder – Garlic powder enhances the savory profile, making each bite irresistible.
- 1 tablespoon onion powder – Onion powder contributes sweetness and depth of flavor to your seasoning mix.
- 1 teaspoon salt (to taste) – Salt helps to amplify all the wonderful flavors in your Beer Can Chicken.
- 1 teaspoon black pepper (to taste) – Freshly ground black pepper brings a subtle heat that balances the other spices.
For the Beer
- 1 can beer (lager or ale) – The beer keeps the chicken moist while infusing it with delicious flavor as it cooks.
Step-by-Step Beer Can Chicken
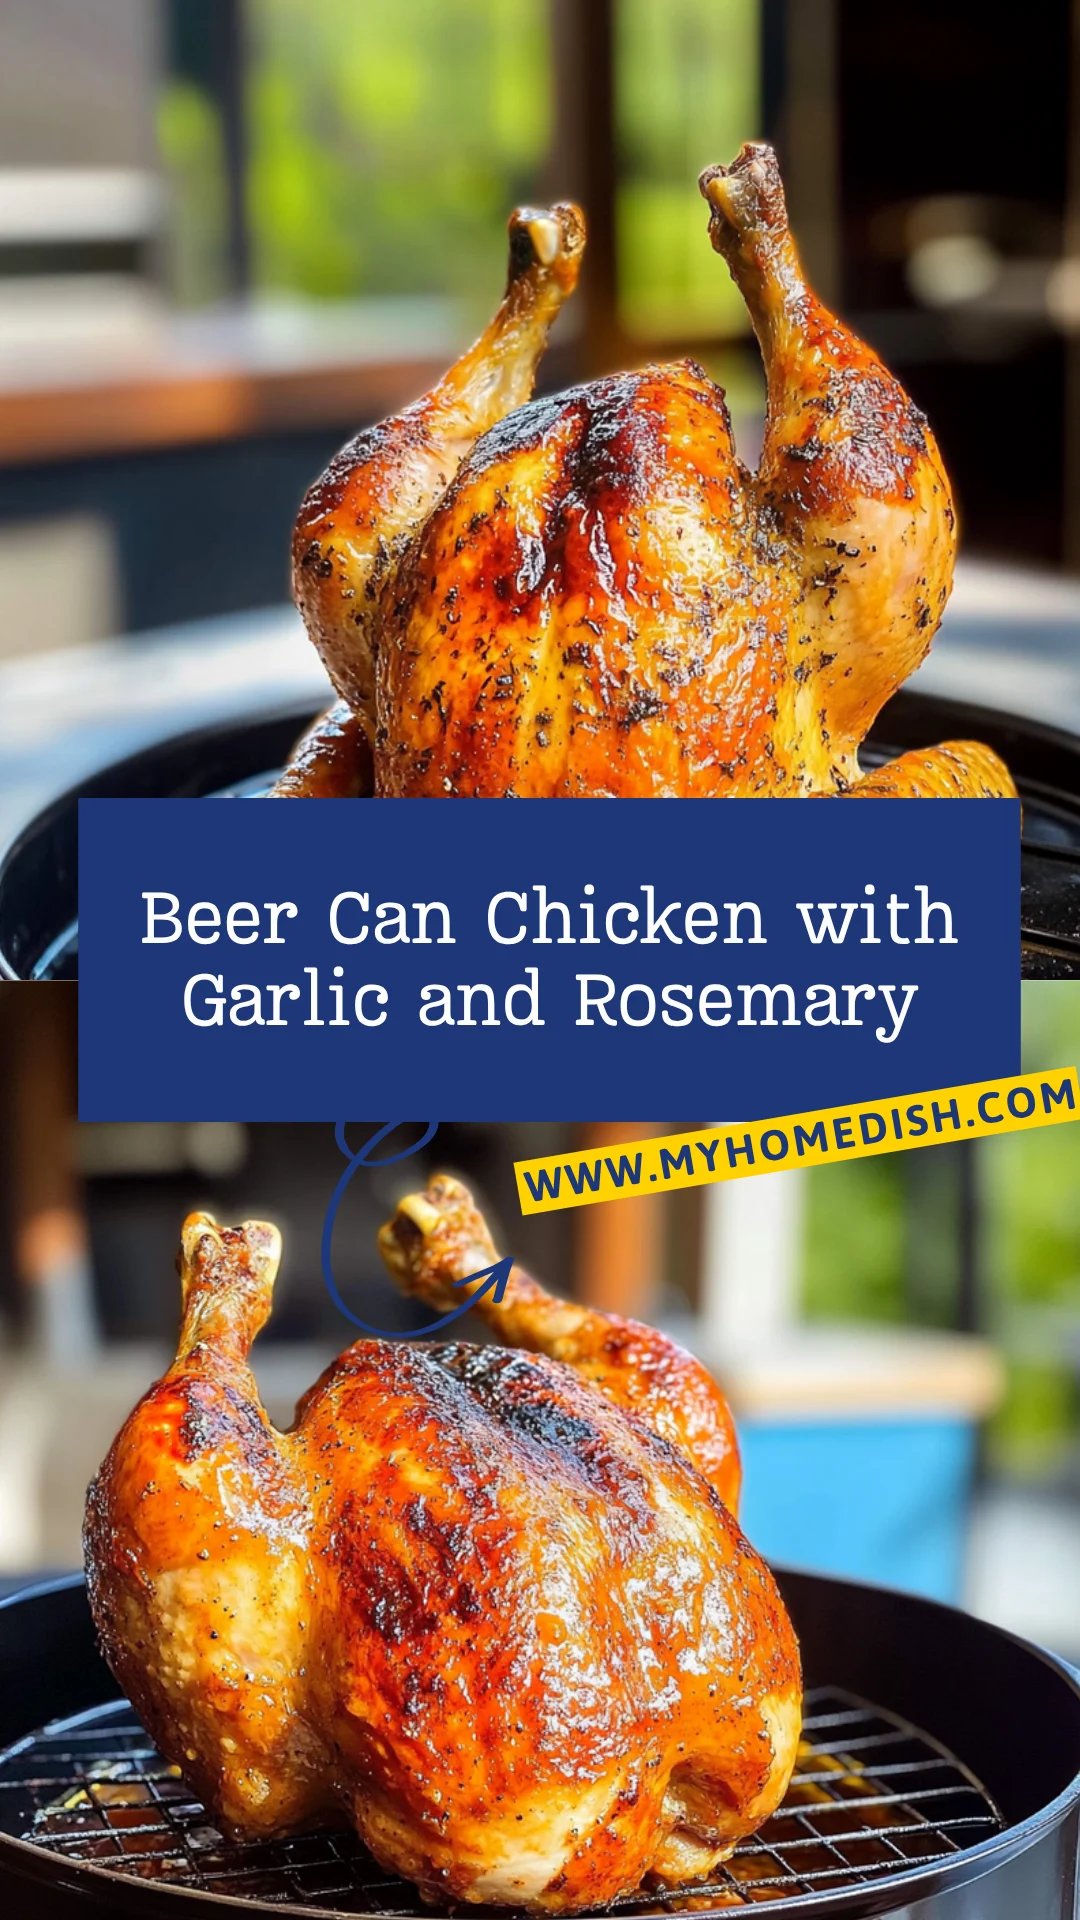
1. Preheat the grill to medium-high heat (about 375°F to 400°F).
Get your grill warmed up to create that perfect roasting environment for our juicy chicken.
2. Mix the seasoning in a small bowl.
Combine 2 tablespoons of olive oil with 1 tablespoon each of paprika, garlic powder, onion powder, salt, and black pepper for a flavorful rub.
3. Pat the chicken dry with paper towels.
Take your whole chicken (about 4-5 pounds) and ensure it’s dry so the seasoning adheres well and promotes a crispy skin.
4. Rub the seasoning mixture all over the chicken.
Generously apply your spice blend, including under the skin, for maximum flavor penetration and a deliciously seasoned roast.
5. Open the can of beer and drink or pour out half of it.
Choose a lager or ale for this step; you’ll want just enough left in the can to steam your chicken from within!
6. Place the beer can in the beer can holder.
Securely set that half-full can into its holder; this will create an upright position for our chicken.
7. Carefully position the chicken over the beer can.
Make sure it sits upright to allow even cooking and flavor infusion from the beer during grilling.
8. Cook the chicken on the grill with the lid closed.
Grill for about 1.5 hours, keeping that lid shut to lock in moisture and ensure even cooking throughout.
9. Check for doneness by measuring the internal temperature at 165°F in the thickest part of the thigh.
This ensures your chicken is perfectly cooked and safe to eat—golden brown skin is a bonus!
10. Remove the chicken from the grill and let it rest for 10 minutes before carefully removing the beer can.
Give it some time to settle; this helps keep those juices locked in for a succulent bite.
11. Carve the chicken and serve hot!
Slice into that beautifully roasted bird and enjoy every tender, flavorful piece with your loved ones.
Optional: Serve with fresh herbs for an aromatic touch!
Exact quantities are listed in the recipe card below.
Pro Tips for Beer Can Chicken
- Chicken Prep: Ensure the chicken is completely dry before seasoning; this helps achieve that perfectly crispy skin.
- Even Coating: Rub the seasoning mixture under the skin and all over to maximize flavor penetration. Don’t skip this step!
- Beer Choice: A lager or ale works best; avoid overly hoppy beers as they can impart an undesirable taste to your chicken.
- Temperature Check: Use a meat thermometer to check the internal temperature at the thickest part of the thigh; aim for 165°F for juicy meat.
- Rest Time: Allowing the chicken to rest for 10 minutes after cooking lets the juices redistribute, ensuring every bite stays moist.
- Can Removal Caution: When removing the beer can, use tongs and be careful; steam can escape and cause burns during this step.
How to Store and Freeze Beer Can Chicken
- Fridge: Store leftover Beer Can Chicken in an airtight container for up to 3 days. This keeps it juicy and flavorful for your next meal.
- Freezer: If you have more than you can eat, wrap the chicken tightly in plastic wrap and foil, then freeze for up to 3 months. Thaw in the fridge before reheating.
- Reheating: To enjoy your Beer Can Chicken again, preheat your oven to 350°F (175°C) and warm it for about 20 minutes or until heated through.
- Room Temperature: Never leave cooked chicken out at room temperature for more than 2 hours to ensure food safety and quality.
Beer Can Chicken Your Way
Feel free to get creative and make this recipe your own with these fun twists and substitutions!
- Herb-Infused: Swap the paprika for dried herbs like thyme or rosemary for a fragrant, earthy flavor. Fresh herbs can elevate your dish, bringing a delightful aroma that fills the air while roasting.
- Spicy Kick: Add cayenne pepper or chili powder to the seasoning blend for an extra heat boost. This will give your chicken a fiery twist that pairs perfectly with its juicy tenderness.
- Citrus Zing: Incorporate lemon or lime juice into the olive oil before coating the chicken. The citrus adds a bright, zesty flavor that cuts through the richness of the meat beautifully.
- Smoky Flavor: Try using a smoked beer for added depth and complexity in flavor. It enhances the overall taste profile while keeping that iconic beer-infused moisture.
- Gluten-Free: Use a gluten-free beer option to cater to dietary needs without sacrificing flavor. A good quality gluten-free lager can still deliver that satisfying taste you crave.
- Sweet Touch: Mix in some brown sugar or honey with your seasoning mixture for a hint of sweetness. This caramelizes beautifully during roasting, giving you a deliciously golden crust.
- BBQ Twist: Brush your chicken with barbecue sauce during the last few minutes of cooking for a sticky, smoky glaze. This adds an exciting layer of flavor that will have everyone reaching for seconds.
Make Ahead Options

Preparing Beer Can Chicken is a fantastic choice for meal prep, allowing you to enjoy juicy, flavorful chicken with minimal effort. To save time, you can season the 4-5 pound whole chicken up to 24 hours in advance. Simply mix together the olive oil, smoked paprika, garlic powder, onion powder, salt, and black pepper in a bowl and rub this mixture all over the chicken, including under the skin. Store the seasoned chicken in the refrigerator until you’re ready to cook. You can also open your can of lager or ale and pour out half of it ahead of time. On grilling day, simply preheat your grill to medium-high heat (375°F to 400°F), place the chicken over the beer can, and cook for about 1.5 hours until it reaches an internal temperature of 165°F in the thickest part of the thigh. This way, when it’s time to serve, all you’ll need is that glorious aroma filling your kitchen and a few minutes of carving—making your Beer Can Chicken not only delicious but incredibly convenient!
Beer Can Chicken Questions Answered
What type of beer is best for beer can chicken?
You can use any lager or ale that you enjoy! A classic choice is a light lager, which complements the chicken without overpowering its flavor. If you prefer something with more character, a hoppy pale ale can add an interesting twist to the taste.
How do I ensure my beer can chicken stays juicy?
The key to juicy chicken lies in the seasoning and cooking technique. Make sure to rub the seasoning mixture under the skin as well as on top. Also, roasting it upright over the beer can helps steam circulate inside, keeping the meat moist. Aim for an internal temperature of 165°F in the thickest part of the thigh—this usually takes about 90 minutes on a medium-high grill.
Can I store leftover beer can chicken?
Absolutely! Once your chicken has cooled, store leftovers in an airtight container in the refrigerator for up to 3-4 days. Reheat in the oven or microwave until warmed through. Just be careful not to overcook it during reheating, as this can lead to dryness.
Is it possible to freeze beer can chicken?
Yes, you can freeze leftover beer can chicken! Wrap it tightly in plastic wrap or aluminum foil and place it in a freezer-safe bag. It will stay good for about 2-3 months. When you’re ready to enjoy it again, simply thaw it in the refrigerator overnight and reheat.
What if I don’t have a beer can holder?
No worries! You can improvise by using a standard empty beer can—just make sure it’s sturdy enough to hold up the chicken. Alternatively, place a small oven-safe dish filled with rice or beans inside your grill and set the chicken on top of that; it’ll still allow for some moisture infusion during cooking.
How many people does this recipe serve?
This delicious beer can chicken serves about 4 people. With a whole bird weighing around 4-5 pounds, each person should get a hearty portion. If you’re serving a larger crowd, consider making two chickens on the grill for double the flavor and fun!
Beer Can Chicken
Ingredients
Method
- Preheat the grill to medium-high heat (about 375°F to 400°F).
- In a small bowl, mix together the olive oil, paprika, garlic powder, onion powder, salt, and black pepper.
- Pat the chicken dry with paper towels and rub the seasoning mixture all over the chicken, including under the skin.
- Open the can of beer and drink or pour out half of it. Place the beer can in the beer can holder.
- Carefully place the chicken over the beer can so that it sits upright.
- Place the chicken on the grill and close the lid.
- Cook for about 1.5 hours, or until the internal temperature reaches 165°F in the thickest part of the thigh.
- Remove the chicken from the grill and let it rest for 10 minutes before carefully removing the beer can.
- Carve the chicken and serve hot.