
Creamy Pumpkin Sage Fettuccine with Toasted Walnuts: Cozy 20-Minute Dinner
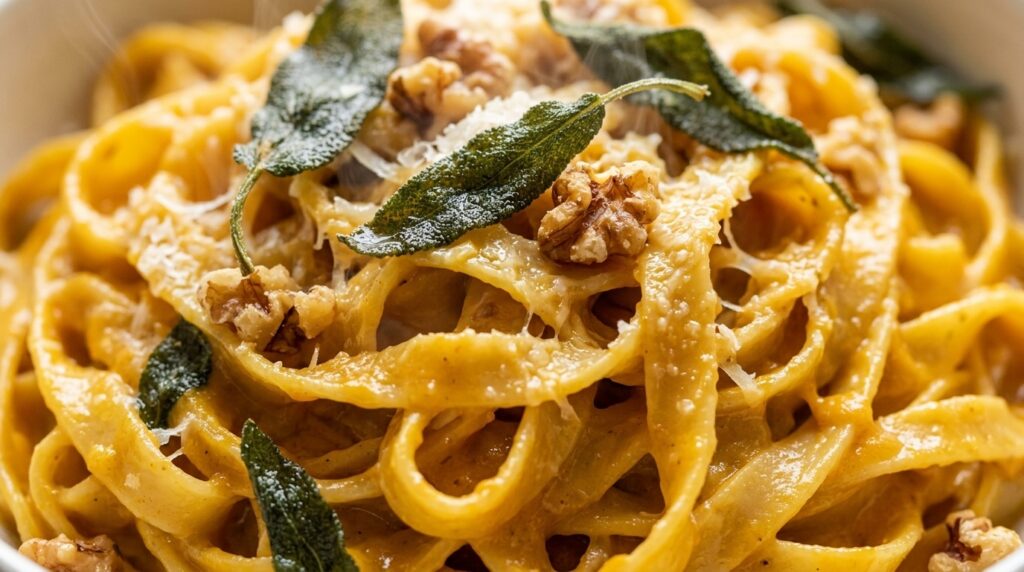
When the crisp autumn air sets in, nothing comforts the soul quite like a steaming bowl of Creamy Pumpkin Sage Fettuccine with Toasted Walnuts. Tender ribbons of wide fettuccine are swirled in a silky, rich sauce made from nutty browned butter, pure pumpkin puree, sweet cream, and savory garlic, topped with the crackling crunch of fried sage leaves and toasted walnuts for pure autumnal perfection. The culinary brilliance of this recipe lies in the balance between savory fat and natural squash sweetness. Canned pure pumpkin on its own can taste dense and earthy; however, when folded into French-style hazelnut-browned butter (beurre noisette) and emulsified with starchy, salted pasta cooking water and heavy cream, the pumpkin breaks down into an impossibly luxurious velvet glaze. A whisper of freshly ground nutmeg and the savory bite of aged Parmigiano-Reggiano tie all the rich fall flavors together in under 20 minutes. Why You’ll Love This Recipe 20-Minute Weeknight Magic: While your pasta boils, the sauce comes together in one single skillet, making this an ideal gourmet weeknight dinner with minimal dishes. Browned Butter Infusion: Browning the butter creates toasted milk solids that lend a deep, hazelnut aroma, elevating simple canned pumpkin into a five-star culinary sauce. Multi-Textured Crunch: Crispy flash-fried sage leaves and toasted earthy walnuts provide an irresistible contrast to the tender, sauce-coated fettuccine ribbons. 100% Halal Wholesome Comfort: Made completely without pork pancetta, bacon grease, or alcohol deglazing. Pure savory depth is unlocked with brown butter, garlic, and starchy pasta water. Key Ingredients & Smart Swaps Fettuccine bundles, pumpkin puree, cream, butter, fresh sage, garlic, and walnuts on a clean quartz workstation. Fettuccine or Tagliatelle: Wide, flat pasta ribbons provide ample surface area for the thick, velvety pumpkin cream to cling to. Pappardelle, rigatoni, or penne also work wonderfully. 100% Pure Pumpkin Puree: Ensure you use pure canned pumpkin puree (such as Libby’s), NOT pumpkin pie mix, which contains added sugar and pie spices. Fresh Sage Leaves: Fresh sage is mandatory here. Frying fresh whole sage leaves in the melting butter crisps the leaves while perfuming the butter with warm woodsy aromatics. Unsalted Sweet Cream Butter: Used to create the browned butter base. Unsalted butter gives you total control over the sodium level while creating nutty toasted solids. Heavy Cream: Adds rich mouthfeel and mellows the acidity of the pumpkin. For a lighter version, whole milk or half-and-half can be used, though the sauce will be slightly thinner. Starchy Pasta Cooking Water: Never pour pasta water down the drain! The salted, cloudy starch water is the culinary glue that bonds the pumpkin, cream, and butter into an emulsified sauce. Toasted Walnuts or Pecans: Raw walnuts toasted in a dry pan bring earthy crunch and healthy fats that complement the sweet squash notes. Step-by-Step Cooking Walkthrough 1. Boil Pasta & Reserve Liquid: Cook fettuccine in a large pot of generously salted boiling water until 1 minute before al dente. Scoop out 1 cup of starchy pasta water before draining. 2. Brown Butter & Crisp Sage: Melt 4 tablespoons of butter in a large sauté pan over medium heat. Fry whole fresh sage leaves for 1 to 2 minutes until crackling crisp. Remove the sage leaves and set aside, keeping the nutty brown butter in the pan. Tossing tender fettuccine ribbons directly through bubbling pumpkin sage cream sauce on active flame. 3. Build the Pumpkin Velvet: Add minced garlic to the browned butter for 60 seconds. Whisk in the pumpkin puree, vegetable broth, heavy cream, kosher salt, black pepper, and nutmeg. Simmer for 2 to 3 minutes until smooth. 4. Emulsify & Glaze: Add the cooked fettuccine, 1/2 cup of reserved pasta water, and grated Parmigiano-Reggiano into the pan. Toss vigorously with tongs for 2 minutes until glossy and clinging. Garnish with toasted walnuts and crispy sage leaves. 3 Chef Secrets for Perfect Results 1. Watch the Butter Browning Closely: Butter transitions from golden foam to nutty browned butter in about 3 minutes, but can burn quickly if left unattended. Look for amber-colored flecks at the bottom of the pan and a distinct hazelnut aroma, then reduce heat immediately. 2. Pasta Water is Non-Negotiable: Pure pumpkin is naturally starchy and fibrous. Adding hot starchy pasta water thins the puree while binding with the butter fat, resulting in a silk-smooth emulsion that coats noodles instead of clumping. 3. Finish the Pasta Inside the Pan: Never spoon sauce over plain noodles in a bowl! Tossing the pasta in the simmering skillet allows the porous, hot noodles to absorb the savory pumpkin cream into their core. What to Serve With Creamy Pumpkin Sage Pasta Served restaurant-style in a ceramic pasta bowl with crusty sourdough bread, cranberry salad, and sparkling apple cider. Toasted Garlic Sourdough Bread: Warm, crusty artisan bread brushed with garlic butter is essential for wiping every last drop of velvety pumpkin cream from the bowl. Arugula, Pear & Cranberry Salad: Peppery baby arugula tossed with thin sliced ripe pears, dried cranberries, and a zesty lemon dijon vinaigrette cuts through the rich sauce. Roasted Chicken or Garlic Butter Shrimp: While this pasta is hearty on its own, sliced grilled chicken breast or seared garlic shrimp makes a fantastic protein pairing. Sparkling Apple Cider: A tall, chilled glass of sparkling cider with a thin apple slice offers refreshing crisp acidity alongside the earthy sage and pumpkin. Storage, Freezing & Reheating Instructions Refrigeration: Store leftover pumpkin pasta in an airtight glass container in the refrigerator for up to 3 to 4 days. Keep extra toasted walnuts and crispy sage in a small separate container to preserve crunch. Skillet Reheating (Best Method): Reheat leftovers in a skillet over low heat with 2 to 3 tablespoons of water, milk, or broth. Gently toss until the sauce re-emulsifies and becomes glossy again. Microwave Reheating: Reheat in 45-second bursts at 60% power, stirring in 1 tablespoon of water or cream halfway through to prevent the sauce from drying out. Freezing: We do not recommend freezing cooked creamy pumpkin pasta, as cream
Garlic Butter Steak Bites with Crispy Potatoes: 25-Minute Skillet Dinner
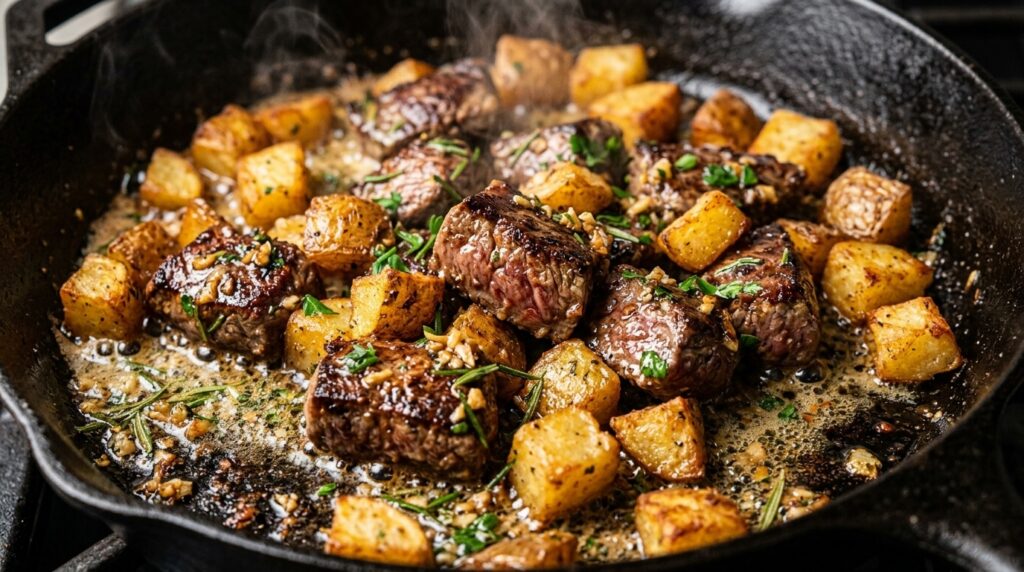
If you are looking for an ultra-satisfying, high-protein weeknight dinner that rivals your favorite high-end steakhouse, these Garlic Butter Steak Bites with Crispy Potatoes are an absolute game-changer. In just 25 minutes, tender, deeply seared beef steak bites and golden crackling potato cubes toss together in a single skillet, bathed in a rich, foaming pool of garlic-infused herb butter that coats every single bite. The culinary secret to mastering this dish in one skillet is a two-stage cooking technique. Potatoes require sustained, moderate heat to break down raw interior starches into fluffy tenderness while creating a crispy exterior shell. Steak cubes, conversely, require blistering high heat for mere minutes to achieve the coveted Maillard reaction crust without overcooking the center into tough shoe leather. By searing the potatoes first, removing them, and flash-searing bone-dry steak bites before uniting them in foaming garlic butter, both elements achieve textbook culinary perfection. Why You’ll Love This Recipe 25-Minute One-Skillet Meal: Everything cooks right in a single cast-iron skillet, delivering a gourmet steak-and-potatoes dinner with virtually effortless cleanup. Incredible Texture Contrast: Crisp-on-the-outside, fluffy-on-the-inside potatoes paired with juicy, caramelized medium-rare beef cubes. High-Protein Fuel: Delivering 44 grams of premium muscle-building protein per serving with clean complex carbohydrates from whole Yukon Gold potatoes. 100% Halal Wholesome Comfort: Naturally made using certified Halal beef, rich beef bone broth deglaze, and pure creamery butter—completely free of pork bacon lard or alcohol additives. Key Ingredients & Smart Swaps Cubed prime steak, diced Yukon Gold potatoes, creamery butter, garlic, and fresh herbs on a clean workstation. Beef Cut (Sirloin, Tenderloin, or Ribeye): Top sirloin steak is our top recommendation for the ideal balance of deep beefy flavor, tenderness, and value. For ultra-luxurious melt-in-your-mouth texture, beef tenderloin (filet mignon) or ribeye works phenomenally well. Yukon Gold Potatoes: Yukon Golds have a naturally buttery yellow flesh and thin skin that crisps beautifully without needing to peel them. Red potatoes or Russets can be substituted; just cut them uniformly into 3/4-inch dice so they cook evenly. Unsalted Sweet Cream Butter: The culinary carrier of flavor. Using unsalted butter allows you to control seasoning while creating a lush, foaming emulsion with minced garlic and herbs. Fresh Garlic Cloves: Freshly minced garlic (not jarred) is crucial. When basted in warm butter, fresh garlic becomes mellow, sweet, and nutty without turning bitter. Fresh Rosemary & Thyme: The resinous oils from fresh woodsy herbs infuse the melted butter and penetrate the caramelized steak crust. Beef Bone Broth: A small 2-tablespoon splash deglazes the pan fond, emulsifying with the melted butter into a glossy steak pan sauce. Step-by-Step Cooking Walkthrough 1. Crisp the Potatoes: Heat 2 tablespoons of olive oil in a large 12-inch cast-iron skillet over medium-high heat. Add diced Yukon Gold potatoes, season with salt, pepper, and smoked paprika, and cook undisturbed for 4 minutes to form a crust. Toss and sauté for another 6 to 8 minutes until fork-tender and crispy. Transfer potatoes to a plate. 2. Prep & Season Steak: Thoroughly pat steak cubes dry with paper towels. Season aggressively on all sides with kosher salt, cracked black pepper, and onion powder. Basting foaming garlic herb butter over seared steak bites and crispy potatoes over active flame. 3. Flash-Sear the Steak: Add 1 tablespoon olive oil to the smoking-hot skillet. Add steak bites in a single layer without crowding. Sear undisturbed for 2 minutes, flip, and cook for 1 to 2 minutes more until deeply browned with charred edges and medium-rare centers. 4. Butter Baste & Unite: Turn heat to low. Drop in butter, minced garlic, rosemary, and thyme. Baste the foaming butter continuously over the steak for 60 seconds. Return crispy potatoes to the pan, splash in beef bone broth, toss to glaze, and remove from heat. Garnish with parsley and flaky sea salt. 3 Chef Secrets for Perfect Results 1. Pat the Steak Bone-Dry Before Searing: Moisture is the enemy of a golden sear. If steak cubes are damp when hitting the hot skillet, they will steam rather than sear, creating gray, rubbery meat instead of a deeply browned mahogany crust. 2. Do Not Overcrowd the Skillet: Cook steak bites with breathing room between pieces. If your skillet is smaller than 12 inches, sear the beef in two quick batches. Overcrowding drops pan temperature and causes the beef juices to pool. 3. Baste at Lower Heat to Avoid Burning Garlic: Garlic burns quickly at high steak-searing temperatures, turning acrid and bitter. Dropping the burner heat to low before adding the butter and garlic preserves the sweet, nutty aromatics while you baste. What to Serve With Garlic Butter Steak Bites Served steakhouse-style in a matte ceramic bowl with grilled asparagus, artisan baguette, and sparkling iced tea. Roasted Garlic Parmesan Asparagus: Tender roasted asparagus spears provide an elegant earthy crunch that balances the rich butter and beef. Toasted Sourdough or French Baguette: Thick, toasted slices of crusty artisan bread are practically mandatory for soaking up the remaining garlicky skillet pan juices. Crisp Garden Salad with Balsamic Vinaigrette: Peppery mixed greens with shaved parmesan and a tart balsamic dressing cut through the savory fat. Sparkling Lemon Iced Tea: An ice-cold glass of sparkling brewed tea with fresh lemon slices complements the caramelized beef beautifully. Storage, Freezing & Reheating Instructions Refrigeration: Place leftover steak bites and potatoes in an airtight container and store in the refrigerator for up to 3 to 4 days. Skillet Reheating (Best Method): Reheat leftovers in a skillet over medium heat with 1 teaspoon of butter or olive oil for 3 to 4 minutes. This re-crisps the potato exterior while gently warming the steak without cooking it past medium. Air Fryer Reheating: Pop leftovers into an air fryer at 360°F (180°C) for 3 to 4 minutes for an ultra-fast, crispy restore. Freezing: We do not recommend freezing cooked steak bites, as beef texture can become dry and potatoes become grainy upon thawing. Enjoy fresh for peak restaurant quality! Frequently Asked Questions What is the best cut of beef for steak bites?Top
Cozy Autumn Chicken Pot Pie Skillet with Puff Pastry: Easy Fall Dinner

When brisk autumn evenings call for the quintessential comfort food, nothing rivals the bubbling aroma of this Cozy Autumn Chicken Pot Pie Skillet with Puff Pastry. Tender pulled chicken, sweet autumn carrots, celery, and sweet peas simmer together in a velvety, herb-infused chicken velouté gravy, crowned with an impossibly flaky, golden-brown puff pastry dome that shatters satisfyingly under your spoon. Traditional double-crust chicken pot pies are notorious for the dreaded soggy bottom crust—a disappointing layer of gummy, undercooked dough soaked in gravy. This skillet adaptation completely solves that problem. By building our rich aromatics and velvety bone broth velouté directly in a heavy cast-iron skillet, we achieve deeper pan fond caramelization. Capping the bubbling filling with all-butter puff pastry ensures every single bite delivers pure, buttery crispness with zero doughy underlayer. Why You’ll Love This Recipe One Skillet Simplicity: The entire velvety filling cooks on the stovetop in one cast-iron skillet, before sliding straight into the oven to puff and brown—meaning fewer dishes and effortless cleanup. Flaky Puff Pastry Perfection: Say goodbye to rolling finicky pie dough or dealing with waterlogged pastry. Store-bought all-butter puff pastry rises into dozens of airy, golden, crisp layers. Velvety Bone Broth Gravy: Made with low-sodium chicken bone broth, butter, flour, and a splash of cream, our savory velouté clings to every shred of chicken without turning thin or watery. 100% Halal Wholesome Comfort: Naturally made without bacon fat, lard, or alcohol deglazing. Pure savory depth comes from caramelized autumn mirepoix and fresh garden herbs. Key Ingredients & Smart Swaps Shredded chicken, puff pastry, carrots, celery, broth, butter, and fresh herbs on a clean quartz workstation. Cooked Shredded Chicken: Store-bought rotisserie chicken or leftover roast chicken breast makes this dish come together in under 40 minutes. Boneless skinless chicken thighs also work wonderfully for richer flavor. All-Butter Puff Pastry: Look for puff pastry made with real butter (such as Dufour or Trader Joe’s) rather than vegetable oil for the flakiest, melt-in-your-mouth pastry layers. Keep it chilled in the fridge until ready to top. Autumn Mirepoix (Carrots, Celery & Onions): The aromatic foundation of classic pot pie. Sautéing them in butter until tender-crisp ensures they retain pleasant texture inside the creamy gravy. Low-Sodium Chicken Bone Broth: Rich in natural gelatin, bone broth provides hearty body and savory mouthfeel without overloading the skillet with sodium. Fresh Thyme & Rosemary: Earthy autumn herbs that cut through the richness of the butter and cream velouté. Heavy Cream: A gentle half-cup swirl rounds out the acidity of the broth, creating an opaque, glossy restaurant-style sauce. Step-by-Step Cooking Walkthrough 1. Sauté the Autumn Aromatics: Melt 3 tablespoons of butter in a 10- or 12-inch cast-iron skillet over medium heat. Sauté the diced onions, carrots, and celery for 6 to 8 minutes until tender-crisp. Stir in minced garlic, thyme, and rosemary for 60 seconds until fragrant. 2. Build the Velouté Roux: Dust flour evenly over the vegetables, stirring continuously for 2 minutes to toast the flour. Slowly pour in chicken bone broth in steady streams, whisking to prevent lumps. Stirring tender shredded chicken and sweet vegetables into simmering golden velouté gravy on active heat. 3. Simmer & Thicken: Stir in heavy cream, kosher salt, black pepper, and nutmeg. Simmer for 3 minutes until thick and velvety. Fold in the shredded chicken and green peas, then remove the skillet from heat. 4. Crown with Puff Pastry & Bake: Drape chilled puff pastry sheet over the skillet, tucking outer edges gently inside the skillet rim. Cut 3 steam vents in the center, brush with egg wash, and bake at 400°F (200°C) for 22 to 25 minutes until deeply puffed and golden. 3 Chef Secrets for Perfect Results 1. Keep the Puff Pastry Cold Until the Final Second: Puff pastry rises when cold butter laminations hit intense oven heat, producing steam that forces the dough layers apart. If your pastry becomes warm or greasy while rolling, pop it back into the freezer for 5 minutes before placing it over the skillet. 2. Cut Generous Steam Vents: The bubbling chicken velouté releases immense steam inside the oven. Cutting 3 to 4 slits in the center of the pastry prevents the crust from ballooning excessively or becoming soggy from trapped moisture. 3. The Pinch of Nutmeg: A classic French culinary secret for white sauces and veloutés. Just 1/8 teaspoon of ground nutmeg balances the dairy and earthiness of carrots and thyme without tasting spiced. What to Serve With Autumn Chicken Pot Pie Served restaurant-style with crisp arugula cranberry salad and chilled sparkling apple cider. Crisp Arugula, Cranberry & Pecan Salad: Peppery baby arugula tossed with dried cranberries, toasted pecans, and a tangy apple cider vinaigrette cuts through the rich, savory pastry gravy. Roasted Autumn Vegetables: Caramelized balsamic Brussels sprouts or roasted honey butter butternut squash cubes echo the warm fall themes. Sparkling Apple Cider: A cold, effervescent glass of sparkling cider with a cinnamon sugar rim provides refreshing festive brightness. Warm Artisan Dinner Rolls: Extra crusty bread is wonderful for wiping every drop of creamy thyme velouté from the plate. Storage, Freezing & Reheating Instructions Refrigeration: Store leftover pot pie in an airtight glass container in the refrigerator for up to 3 to 4 days. Keep any remaining puff pastry crust loosely resting on top. Oven Reheating (Best Method): Never microwave puff pastry, as it becomes rubbery and limp. Reheat leftover portions on a baking sheet in a 375°F (190°C) oven or toaster oven for 10 to 12 minutes. The pastry will re-crisp to bakery perfection while the filling warms through. Make-Ahead Filling: You can prepare the chicken and vegetable velouté filling up to 24 hours in advance and refrigerate in the skillet. When ready to serve, bring the filling to a warm simmer on the stove, lay the chilled puff pastry on top, egg wash, and bake as directed. Freezing: We recommend freezing the filling separately in an airtight freezer container for up to 2 months. Thaw overnight, warm in your skillet, and top with
Ultra-Creamy Make-Ahead Garlic Herb Mashed Potatoes: Holiday Side Dish
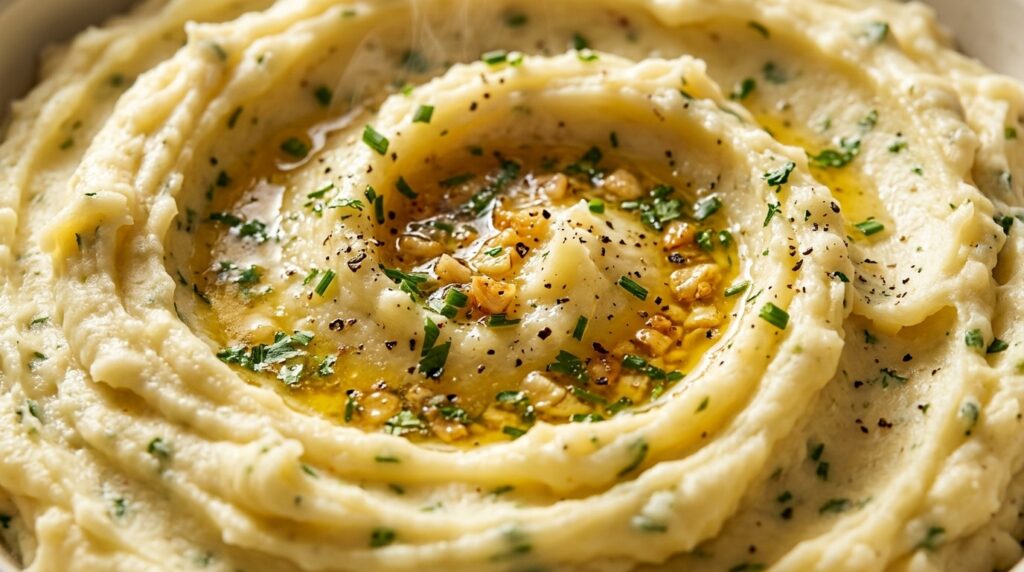
If there is one side dish that commands the entire holiday feast, it is an opulent, cloud-soft bowl of Ultra-Creamy Make-Ahead Garlic Herb Mashed Potatoes. Velvety smooth, delicately infused with sweet roasted garlic, melted creamery butter, and fragrant herbs, these potatoes deliver five-star steakhouse luxury straight to your festive table—without a single minute of last-minute stress. The secret to foolproof holiday mashed potatoes lies in culinary starch control and fat emulsification. By starting golden Yukon Gold potatoes in cold salted water and steaming off excess moisture before mashing, we eliminate graininess and waterlogging. Folding in softened cream cheese alongside warm herb-infused cream coats the potato starch granules in protective dairy fat, ensuring your potatoes remain billowy, silky, and luxuriously rich even when prepped up to 48 hours in advance. Why You’ll Love This Recipe 100% Stress-Free Make-Ahead: Fully prepare up to 2 days ahead of Thanksgiving or Christmas dinner, then reheat in your oven or slow cooker with zero texture loss. Velvety Steakhouse Texture: Using a potato ricer and warm dairy guarantees an impossibly silky, cloud-like consistency with no gluey starch breakdown. Aromatic Garlic Herb Infusion: Minced garlic gently simmered in melted butter releases sweet, mellow flavors with fresh rosemary, thyme, and chives in every spoonful. Naturally Halal Wholesome: Made with wholesome dairy, fresh herbs, and zero pork or alcohol additives, making it universally welcoming for every dinner guest. Key Ingredients & Smart Swaps Fresh Yukon Gold potatoes, creamery butter, garlic, herbs, cream, and cream cheese on a clean workstation. Yukon Gold Potatoes: Naturally buttery with medium starch content, Yukon Golds hold less water than Russets and produce a creamier, richer mash. You can also use a 50/50 mix of Yukon Golds and Russet potatoes for extra fluffiness. Full-Fat Cream Cheese: The culinary game-changer for make-ahead potatoes. Its natural lactic acid and stable milk fat act as an emulsifier that prevents dairy separation and keeps the potatoes moist during refrigeration and reheating. Unsalted Sweet Cream Butter: Divided into two portions—one melted with garlic and fresh herbs to extract aromatic oils, and the other folded in cold to enrich the warm potato starch. Fresh Garlic: Minced and gently warmed in butter over low heat. Waking up the garlic in butter mellows sharp sulfur compounds into sweet, savory perfection without burning. Heavy Cream or Half-and-Half: Always warmed before adding to hot potatoes. Adding cold liquid cools down potato starch rapidly, resulting in a gummy, dense texture. Fresh Rosemary, Thyme & Chives: Fresh herbs provide bright green flecks and an elegant earthy aroma that lifts the rich, buttery dairy. Step-by-Step Cooking Walkthrough 1. Boil from Cold Water: Place peeled, evenly diced Yukon Gold potato chunks into a large Dutch oven. Cover with cold tap water by 1 inch and generously season with kosher salt. Bring to a rolling boil over high heat, then adjust to medium and cook for 15 to 18 minutes until completely tender when pierced with a fork. 2. Steam-Dry the Potatoes: Drain potatoes thoroughly in a colander. Return the drained hot potatoes back into the empty, warm Dutch oven over low heat for 1 to 2 minutes, shaking the pot gently. You will see steam rapidly escaping; drying the potato surface prevents watery, diluted mashed potatoes. Folding warm melted garlic herb butter and rich cream into steaming hot riced potatoes. 3. Rice the Potatoes: Pass the hot potatoes through a stainless steel potato ricer or food mill directly back into the warm pot. This creates the most uniform, cloud-soft texture possible without crushing cell walls into gummy glue. 4. Fold in the Warm Herb Emulsion: In a separate small saucepan, warm the butter, minced garlic, rosemary, and thyme until fragrant, then whisk in the cream. Fold the softened cream cheese and remaining butter into the hot riced potatoes, followed by pouring the warm garlic-herb cream in steady streams while gently folding with a silicone spatula. 3 Chef Secrets for Perfect Results 1. The Potato Ricer is Mandatory for Restaurant Quality: Hand mashers leave stubborn lumps, while food processors or electric beaters rupture potato starch cells into sticky wallpaper paste. A potato ricer extrudes potato flesh cleanly, yielding the fluffiest, lightest mashed potatoes you have ever tasted. 2. Synchronize Liquid Temperature: Never pour cold milk or cream into steaming potatoes. Cold dairy shocks the hot starch and causes the potato granules to contract, resulting in a separated, oily finish. Keeping your cream and infused herb butter warm ensures an instant, silky emulsion. 3. The Steam-Dry Technique: Water is the arch-nemesis of flavorful mashed potatoes. Cooking the drained potatoes on low heat for 90 seconds drives off residual surface water, creating thirsty potato starch ready to absorb maximum herb butter and cream. What to Serve With Garlic Herb Mashed Potatoes Served holiday-style in an artisan ceramic bowl with savory roast gravy and festive table trimmings. Rich Roast Turkey or Chicken: The quintessential centerpiece pairing. Ladle savory herb gravy into the mashed potato crater for the ultimate holiday bite. Garlic Butter Steak Bites or Roast Beef: The creamy, velvety potatoes provide the perfect luxurious base for seared beef tenderloin, ribeye steaks, or prime rib. Crispy Roasted Vegetables: Pair with balsamic-glazed roasted Brussels sprouts, caramelized honey carrots, or garlic parmesan green beans for color and texture balance. Sparkling Apple Cider: A crisp, effervescent glass of chilled sparkling cider or ginger spritz cuts through the buttery richness with festive flair. Storage, Freezing & Reheating Instructions Make-Ahead Refrigeration (Up to 48 Hours): Allow the prepared mashed potatoes to cool slightly, then transfer them into a buttered 9×13 baking dish or airtight glass container. Press a sheet of plastic wrap directly onto the surface of the potatoes to prevent a skin from forming, cover with foil or a lid, and chill for up to 2 days. Oven Reheating Method (Best for Crowds): Remove the dish from the fridge 30 minutes before baking to take off the chill. Keep covered tightly with aluminum foil and bake at 350°F (175°C) for 30 to 35 minutes until heated
Imagine biting into a perfectly grilled corn on the cob, where the sweet, juicy kernels burst with flavor and the smoky aroma dances in the air. Each bite is a delightful mix of tender texture and buttery goodness that transports you to sun-soaked summer afternoons spent laughing with friends and family at backyard barbecues. Corn on the cob isn’t just food; it’s a nostalgic experience that evokes memories of warm evenings, laughter echoing under twinkling stars, and the simple joy of sharing delicious moments together. Whether it’s slathered in garlic butter or generously sprinkled with zesty cheese, this dish promises an explosion of flavor that will have everyone coming back for seconds. Why Is Corn on the Cob So Irresistibly Good? Sweetness in every bite, fresh corn on the cob elevates any meal with its natural flavor. Quick and easy, this recipe takes just 10 minutes to prepare, making it a perfect side dish for busy summer days. Versatile enough to pair with butter, salt, and pepper, you can customize it to suit your taste. Crowd-pleaser at barbecues, it’s a dish that brings everyone together—who can resist that gorgeous golden hue? Ingredients for Corn on the Cob For the Corn 4 ears fresh corn on the cob (husked and cleaned) – Choose vibrant, fresh ears for the sweetest taste in your summer dishes. For the Butter 4 tablespoons unsalted butter (melted for serving) – Melted butter enhances the natural sweetness of the corn on the cob, making every bite irresistible. For the Salt 1 teaspoon salt (for boiling) – Adding salt to the boiling water helps enhance the flavor of the corn as it cooks. For the Pepper to taste black pepper – A sprinkle of black pepper adds a delightful kick to balance the sweetness of your corn on the cob. How to Make Corn on the Cob 1. Fill a pot: Begin by filling a large pot with water and add 1 teaspoon of salt. Bring the water to a rolling boil, which usually takes about 5-7 minutes. 2. Cook the corn: Carefully add the 4 ears of husked and cleaned corn to the boiling water. Cook for 7-10 minutes until the kernels are tender and bright yellow. 3. Drain the corn: Using tongs, remove the corn from the pot and let it drain. The steam will rise, so be cautious! 4. Serve hot: Place the tender corn on a serving plate, drizzle with 4 tablespoons of melted unsalted butter, and season with salt and black pepper to taste. For Grilling Method: 5. Preheat the grill: Heat your grill to medium-high, around 400°F (200°C). This usually takes about 10 minutes; you want it hot for that perfect char! 6. Grill the corn: Lay the husked corn directly on the grill grates and cook for about 10-15 minutes, turning occasionally until charred and fragrant. 7. Cool slightly: Once grilled to perfection, remove the corn from the grill and let it cool slightly before serving. 8. Season and serve: Just like before, brush on some melted butter, sprinkle with salt, and add black pepper as desired for an irresistible finish. Optional: Add a sprinkle of fresh herbs for extra flavor! Exact quantities are listed in the recipe card below. Pro Tips for Corn on the Cob Freshness Matters: Choose ears of corn that feel firm and have bright green husks; this ensures maximum sweetness and tenderness. Salt in Water: Adding salt to your boiling water enhances the flavor of the corn; don’t skip this step for a more savory bite! Timing is Key: Avoid overcooking by sticking to 7-10 minutes in boiling water; too long can make the kernels tough. Grill it Right: For grilling, rotate the corn every few minutes to achieve even char without burning; this adds delicious smokiness. Butter Bliss: Melt your butter before serving; pouring hot butter over the corn allows it to soak into the kernels beautifully. Cool Down Tip: Let grilled corn cool slightly before serving to avoid burns and enhance flavor absorption from seasonings. How to Store and Freeze Corn on the Cob Room Temperature: Store husked corn on the cob in a cool, dry place for up to 1 day. Keep it in a breathable bag to maintain freshness. Fridge: Place cleaned corn on the cob in a plastic bag or wrapped in damp paper towels. It will stay fresh for up to 3 days in the fridge. Freezer: For long-term storage, blanch corn on the cob for 4-5 minutes, then freeze in airtight bags. It can last up to 6 months this way. Reheating: To reheat boiled corn on the cob, place it in hot water for about 5 minutes or microwave with a damp paper towel for 2-3 minutes until warmed through. Corn on the Cob Your Way Feel free to get creative with your sweet and tender kernels, adding flavors that make your taste buds dance! Spicy Kick: Add a sprinkle of cayenne pepper or chili powder for a delightful heat that complements the sweetness. This twist can transform your simple corn into a zesty treat, perfect for spice lovers. Herb Infusion: Toss fresh herbs like cilantro or basil into melted butter before drizzling it over your corn. The aromatic flavors will elevate your dish and bring a refreshing touch to each bite. Cheesy Delight: Sprinkle grated Parmesan or crumbled feta cheese over the hot corn right after buttering. The creamy texture adds richness while enhancing the overall flavor, making it an irresistible side. Smoky Flavor: Brush the corn with smoked paprika before boiling for a deep, smoky taste. This addition gives an extra dimension to the sweetness, reminiscent of summer barbecues. Lemon Zest: Grate some lemon zest over the finished corn for a bright, citrusy flavor boost. It cuts through the richness of the butter and adds a refreshing twist that’s truly delightful. Maple Sweetness: Drizzle maple syrup over the corn instead of butter for a unique sweet treat. This alternative creates a wonderful contrast between savory
Delicious After Game Snacks for Kids Sports: Energy Bites & More
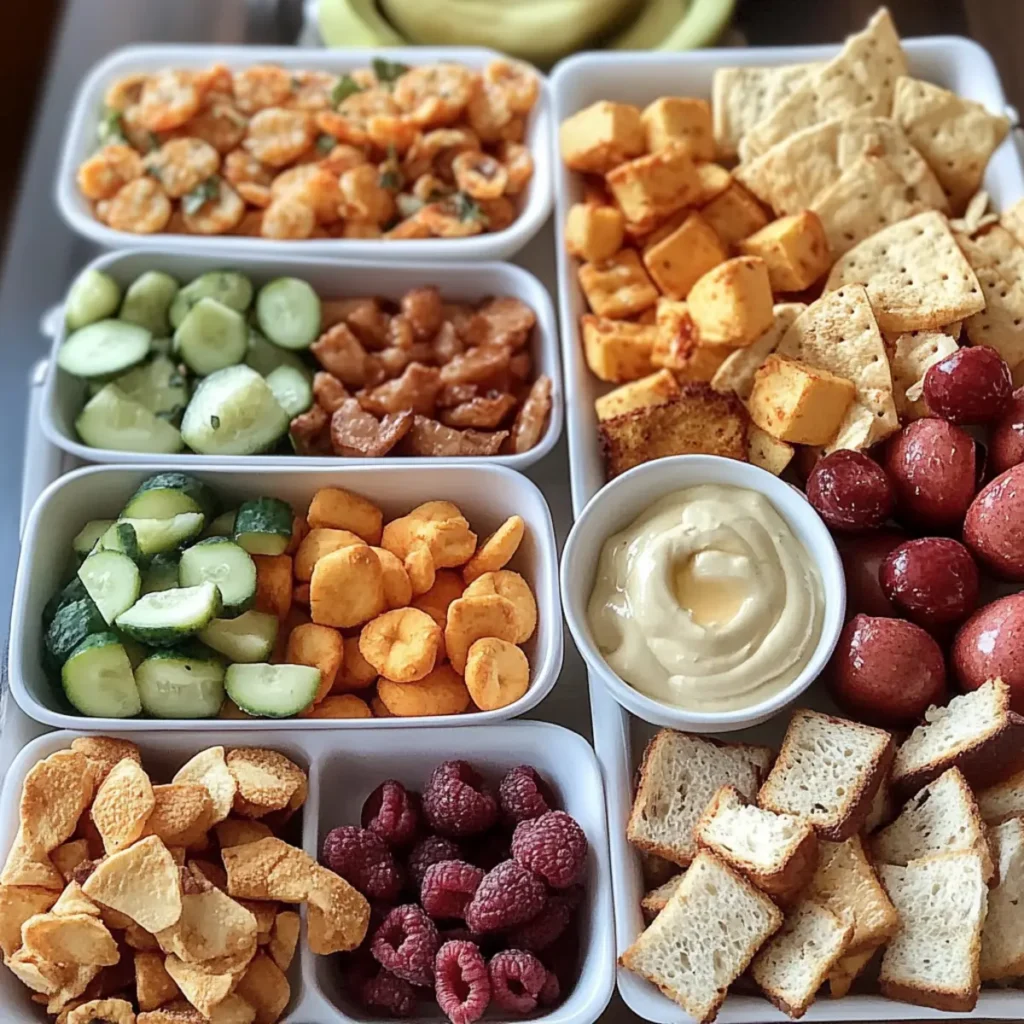
After a victorious day on the field, there’s nothing quite like digging into some delicious after-game snacks for kids sports. Picture this: your little athletes, still buzzing from excitement, gather around the table, eager to refuel their energy and share stories of their amazing plays. These energy bites and colorful veggies, adorned with a delightful dip, offer the perfect blend of nutrition and taste, leaving everyone with smiles as bright as the game’s trophy. Imagine the aroma of wholesome oats mingling with the rich scent of almond butter, intertwined with little bursts of chocolate joy. Whipping up these after-game snacks is not just about feeding hungry tummies; it’s about creating heartwarming memories with family and friends, all while providing a tasty reward after a hard-fought match. Ingredients for After Game Snacks for Kids Sports Here’s what you’ll need to make this delicious After Game Snacks for Kids Sports: 1 cup rolled oats – The base of our energy bites, giving them a hearty texture and energy boost. 1/2 cup almond butter – Creamy and nutty, this binds the ingredients together while adding healthy fats. 1/4 cup honey – A natural sweetener that adds sticky goodness and a touch of sweetness everyone will love. 1/4 cup mini chocolate chips – For a little indulgence, these delightful morsels bring a fun chocolatey twist. 1/4 cup shredded coconut – Adds chewiness and a tropical flair to the energy bites. 1/2 cup Greek yogurt – Creamy and tangy, perfect for our tasty dipping sauce, loaded with protein. 1 tablespoon honey – A touch more sweetness for our dipping sauce, enhancing the flavor. 1 teaspoon vanilla extract – This ingredient is essential to bring out the sweetness in our dipping sauce. 1 cup bell peppers – Colorful and crispy, these add crunch and freshness when sliced into fun shapes. 1 cup cucumbers – Sliced into rounds or sticks, cucumbers are hydrating and add a refreshing bite. 1 cup carrots – Sweet and crunchy, they’re a classic, beloved vegetable for kids. 1 cup cheese cubes – Creamy and flavorful; cheese is always a hit when it comes to kid-friendly snacks. 1 cup whole grain crackers – The perfect accompaniment, providing a satisfying crunch to complement the veggies. How to Make After Game Snacks for Kids Sports Follow these simple steps to prepare this delicious After Game Snacks for Kids Sports: Step 1: Prepare the Energy Bites In a mixing bowl, combine rolled oats, almond butter, honey, mini chocolate chips, and shredded coconut. Use a sturdy spatula or your hands to mix until well combined. Step 2: Form the Bites Once the mixture is combined, start forming small energy bites by rolling the mixture into little balls, about the size of a tablespoon. Place them on a parchment-lined baking sheet. Step 3: Make the Dipping Sauce In a separate bowl, combine Greek yogurt, honey, and vanilla extract. Whisk until the ingredients are well blended and smooth, creating a delightful sauce. Step 4: Prepare the Veggies Wash and slice the bell peppers, cucumbers, and carrots into fun shapes, like stars or hearts. This adds an enjoyable aesthetic for the kids to dig into. Step 5: Assemble Everything Arrange the energy bites on a platter next to the colorful veggie shapes, cheese cubes, and whole grain crackers, creating a vibrant display. Step 6: Serve and Enjoy Serve the energy bites with the yogurt dipping sauce alongside the sliced vegetables, cheese, and crackers. Watch the kids dive in with glee, discussing their game while munching on these delicious bites. The excitement of the game doesn’t have to end on the field; it can continue in the kitchen, where little hands can help mix, roll, and arrange. These after-game snacks for kids sports not only offer nourishment but also a fun, engaging way to celebrate teamwork, spirit, and delicious food. Delicious also means nutritious! Packed with wholesome ingredients, these after-game snacks will keep your kids hopping with energy long after the final whistle of the game. So, the next time your kiddos return home, victorious or not, whip up this easy recipe and watch their faces light up! Perfecting After Game Snacks for Kids Sports Cooking Process Start by preparing your energy bites first; mix the rolled oats, almond butter, honey, mini chocolate chips, and shredded coconut. While the energy bites chill in the fridge, you can slice up the vegetables for a colorful and nutritious side, saving time and keeping everything organized. Add Your Touch to After Game Snacks for Kids Sports Feel free to swap out almond butter for peanut butter if your kids enjoy that flavor more. Add different kinds of mini chocolate chips—dark chocolate, white chocolate, or even butterscotch—depending on what your little athletes prefer. Toss in some chia seeds or dried fruit for added nutrition and flavor. Storing & Reheating After Game Snacks for Kids Sports To store your energy bites, keep them in an airtight container in the refrigerator for up to a week. The veggie sides and dipping sauce can also be stored separately in the fridge. No reheating is necessary—serve cold or at room temperature! While making these after game snacks, I remember the joy on my kids’ faces when they took their first bite, claiming it was the best treat after winning a match. It’s those little moments that make cooking so worthwhile. FAQs About After Game Snacks for Kids Sports What is After Game Snacks for Kids Sports? After Game Snacks for Kids Sports typically refer to nutritious, energy-boosting treats that kids can enjoy post-game to replenish their energy and satisfy their hunger. These snacks often combine healthy ingredients that provide proteins, carbs, and fats, making them ideal for young athletes. Energy bites, veggie platters, and cheese with whole grain crackers are excellent choices that not only taste good but also fuel active bodies after a game or practice session. How can I make After Game Snacks for Kids Sports healthier? To make After Game Snacks for Kids Sports healthier,
Easy Air Fryer Shrimp Recipe – Crispy, Flavorful, and Quick
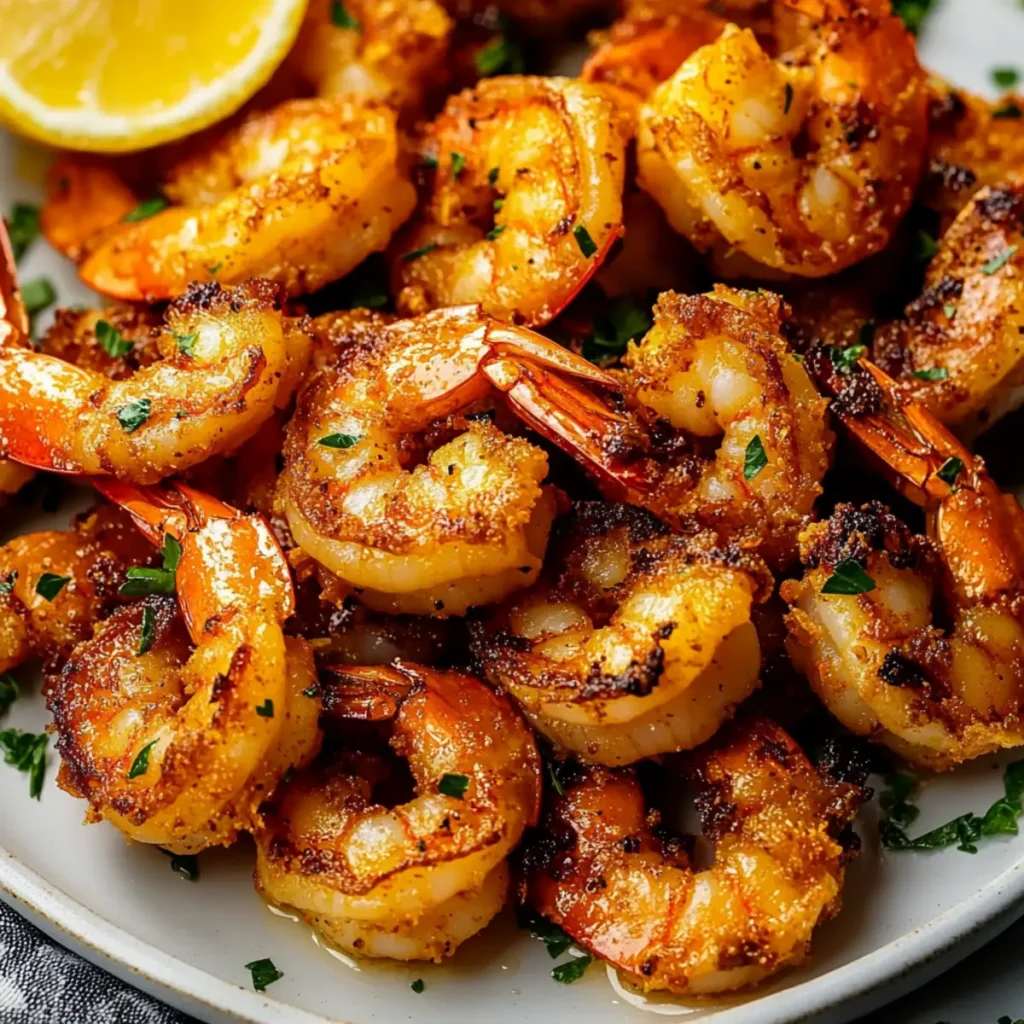
There’s something utterly delightful about air frying, especially when it comes to making shrimp. Imagine plump, juicy shrimp coated in a light seasoning, cooking to crispy perfection without the guilt of deep frying. This is precisely what you can expect with our scrumptious Air Fryer Shrimp. The succulent seafood, with a slight crunch from the air fryer, delivers a taste that’s as close to the beach as you can get without needing a sandy towel. Let’s be honest: cooking shrimp can sometimes feel like an underwater adventure. So many options, from grilling to boiling, can leave you feeling adrift. But with this Air Fryer Shrimp recipe, you can embark on a culinary journey that’s quick, easy, and downright delicious, making it the ideal dish for busy weeknights or impromptu get-togethers. Ingredients for Air Fryer Shrimp Here’s what you’ll need to make this delicious Air Fryer Shrimp: 1 pound large shrimp – Fresh or frozen shrimp work perfectly; just be sure to thaw them if they’re frozen. Look for shrimp that’s firm and slightly sweet. 2 tablespoons olive oil – This adds a lovely richness and helps the spices stick to the shrimp while keeping them moist. 1 teaspoon garlic powder – Garlic powder infuses the shrimp with that wonderful, savory flavor we all crave. 1 teaspoon paprika – This spice adds a hint of smokiness and vibrant color to your dish. Salt and pepper – Customize to your taste; these enhance all the other flavors without overpowering them. 1 tablespoon lemon juice – Fresh lemon juice brightens the dish, balancing out the richness and adding zing. How to Make Air Fryer Shrimp Follow these simple steps to prepare this delicious Air Fryer Shrimp: Step 1: Preheat the Air Fryer Start by maneuvering your air fryer to the counter like a pro. Preheat it to 400°F (200°C) for about 3-5 minutes. This ensures that your shrimp gets that perfect crispy exterior. Step 2: Prepare the Shrimp In a mixing bowl, combine your shrimp, olive oil, garlic powder, paprika, salt, pepper, and lemon juice. Toss them together with the enthusiasm of someone discovering shrimp is on sale. Make sure the shrimp are evenly coated, as this is where the magic begins. Step 3: Arrange the Shrimp in the Basket Carefully place the shrimp in the air fryer basket in a single layer, making sure there’s space between each one. This will ensure that they cook uniformly and get that delightful crunch without steaming. Step 4: Cook the Shrimp Set the timer for 8-10 minutes and let your air fryer do its thing. Halfway through, give the basket a little shake to ensure that all sides of the shrimp are cooked evenly. You’ll know they’re ready when they turn a beautiful pink and look crispy, almost like they’re in a summer vacation snap! Step 5: Serve with Style Once cooked, transfer your shrimp to a serving platter. You can dress it up with extra lemon slices or sprinkle some fresh herbs on top for flair. Pair it with your favorite dipping sauce for a meal that’s not just tasty but visually stunning too. And voilà—it really is that simple! Now you have perfectly cooked Air Fryer Shrimp that you can savor by itself, toss into a salad, or use to elevate your taco night. It’s the epitome of versatility and flavor packed into every crispy bite. Enjoy this recipe any day of the week—you’ve earned it! Perfecting Air Fryer Shrimp Cooking Process To achieve perfect Air Fryer Shrimp, start by preheating your air fryer. While it’s heating, toss your shrimp with the seasonings in a bowl. This ensures they are perfectly seasoned and ready to cook evenly. Add Your Touch to Air Fryer Shrimp Feel free to customize your Air Fryer Shrimp with different spices like Cajun seasoning for a kick, or fresh herbs like parsley for a burst of freshness. You can also add a splash of hot sauce for those who crave a bit more heat. Storing & Reheating Air Fryer Shrimp Store leftover Air Fryer Shrimp in an airtight container in the refrigerator for up to two days. To reheat, pop them back in the air fryer for a few minutes to restore their crispiness. Sometimes, when I’m cooking, I make a little too much shrimp for dinner. My friends once devoured a platter, claiming it was the best shrimp they’d ever had, leading to a surprisingly competitive cook-off! FAQs About Air Fryer Shrimp What is Air Fryer Shrimp? Air Fryer Shrimp is a delicious and healthier way to prepare shrimp using an air fryer. This cooking method uses hot air circulation to create crispy shrimp without the need for excessive oil. The result is succulent, flavorful shrimp that are easy to make and perfect for quick meals or entertaining. With simple ingredients like olive oil, garlic powder, and lemon juice, you can whip up Air Fryer Shrimp in just around 20 minutes. How do you season Air Fryer Shrimp? Seasoning Air Fryer Shrimp is both fun and delicious! You can keep it simple with olive oil, garlic powder, paprika, salt, and pepper. For a spicier kick, try adding Cajun seasoning or crushed red pepper flakes. Fresh herbs, such as parsley or cilantro, can add a burst of flavor and freshness. Experiment with different spices to find your perfect seasoning blend tailored to your taste. Can I use frozen shrimp for Air Fryer Shrimp? Absolutely! Frozen shrimp works wonderfully for Air Fryer Shrimp. Just ensure that you thaw the shrimp completely before seasoning and cooking. You can do this by placing them in cold water for about 15-20 minutes, or leaving them in the refrigerator overnight. Cooking from frozen can result in slightly longer cooking times, so keep an eye on them to ensure they achieve that perfect crispy texture. What should I serve with Air Fryer Shrimp? Air Fryer Shrimp is incredibly versatile and pairs well with many side dishes. Consider serving it with a fresh salad, white
Delicious Carrot Top Pesto Recipe in Just 10 Minutes
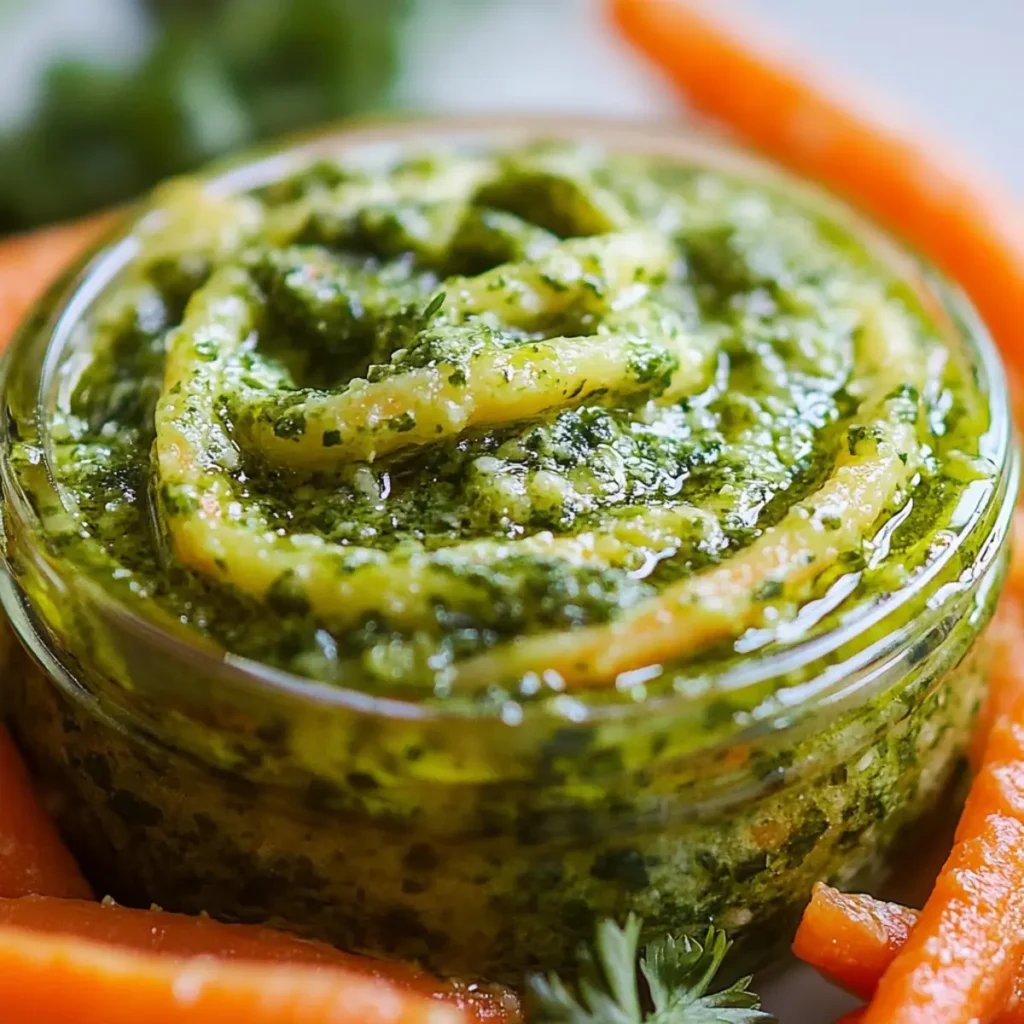
In the vibrant world of cooking, you may find yourself at the crossroads of the mundane and the magical. Introducing Carrot Top Pesto, a dish that takes the often-overlooked greens from a humble carrot and elevates them to new culinary heights. Imagine a bright, fresh flavor that dances on your palate, bringing a delightful twist to the classic pesto tale. You might be wondering when and where you can whip up this creamy wonder. This Carrot Top Pesto is an ideal companion for pasta nights, a winning spread on crusty bread during brunch, or even a flavorful dip for that casual gathering with friends. Get ready for a taste adventure where vibrancy meets versatility! Ingredients for Carrot Top Pesto Here’s what you’ll need to make this delicious Carrot Top Pesto: 2 cups carrot tops – These vibrant green tops are packed with flavor and nutrients, making them the hero of our dish. Look for healthy, fresh tops without excess wilting. 2 cloves garlic – Fresh garlic adds a robust depth to the pesto. You can use roasted garlic for a sweeter, milder flavor if that’s more your style. 1/4 cup pine nuts – These little gems contribute a buttery richness. Don’t fret if you’re nut-free; pumpkin seeds or sunflower seeds work wonderfully as a substitute! 1/2 cup Parmesan cheese – This classic cheese offers that savory umami kick. For a vegan alternative, nutritional yeast can provide a similar flavor profile. 1/2 cup olive oil – Extra virgin olive oil is the gold standard here, bringing luscious body and peppery notes to the mix. 1 tablespoon lemon juice – This zesty addition brightens the pesto and balances out the richness of the nuts and cheese. Salt and pepper to taste – The finishing touch that rounds out all the flavors, adjusting according to your palate. How to Make Carrot Top Pesto Follow these simple steps to prepare this delicious Carrot Top Pesto: Step 1: Prepare the Carrot Tops Begin by rinsing your carrot tops thoroughly under cold water to remove any dirt or grit. Pat them dry with a clean kitchen towel and get ready to unleash their deliciousness. Step 2: Toast the Pine Nuts In a small skillet over medium heat, toast the pine nuts lightly for about 3-4 minutes. Shake the pan frequently to ensure even browning and prevent burning, creating a nutty aroma that will fill your kitchen with warmth. Step 3: Blend Everything Together In your trusty food processor, combine the carrot tops, toasted pine nuts, garlic cloves, Parmesan cheese, olive oil, lemon juice, salt, and pepper. Press the pulse button a few times to break down the ingredients. Step 4: Achieve Creamy Perfection Keep blending until the mixture reaches a smooth, creamy consistency, scraping down the sides as necessary. If it seems too thick, you can adjust the texture by drizzling in a little extra olive oil. Step 5: Taste and Adjust Now’s the fun part—taste your creation! Adjust the seasoning with more salt, pepper, or lemon juice if you’d like. This is personal; make it your own! Step 6: Serve and Delight Transfer the Carrot Top Pesto to a serving bowl. Drizzle with a bit more olive oil, and serve it up with your favorite pasta, spread it on toasted bread, or use it as a dip for vibrant veggies. The possibilities are endless! When you serve this stunning Carrot Top Pesto, expect plenty of compliments and requests for the recipe. Whether it’s a cozy family dinner or a gathering with friends, this sauce will be the star of the show. Dive in, enjoy, and savor each vibrant bite! Perfecting Carrot Top Pesto Cooking Process Start by gathering all your ingredients to create an efficient cooking process. Begin by blending the carrot tops and roasted garlic first to ensure they are finely processed. Then, gradually add in the remaining ingredients and blend until smooth. Add Your Touch to Carrot Top Pesto Feel free to get creative with your Carrot Top Pesto! Swap out pine nuts for walnuts or any nut you prefer. Try adding a splash of balsamic vinegar for an unexpected tang or some fresh basil for a flavor boost. Storing & Reheating Carrot Top Pesto Store your Carrot Top Pesto in an airtight container in the fridge for up to one week. If you’re freezing it, add a thin layer of olive oil on top to maintain freshness. When reheating, simply mix it back into your desired dish until heated through. Sometimes, when I whip up this Carrot Top Pesto, I can’t help but smile when my friends rave about it. One barbecue, the dish completely stole the show and left everyone asking for the “secret ingredient.” It was a proud moment indeed! FAQs About Carrot Top Pesto What is Carrot Top Pesto? Carrot Top Pesto is a vibrant, flavorful twist on the classic Italian sauce that typically uses basil. Made primarily from the green tops of carrots, this lively condiment is blended with ingredients like garlic, pine nuts, Parmesan cheese, and olive oil. The result is a deliciously creamy and herby spread that’s perfect for pasta, sandwiches, or as a dip. It’s a fantastic way to utilize carrot tops, which are often discarded, turning them into a culinary delight that’s both sustainable and scrumptious. How do I store Carrot Top Pesto? To store your Carrot Top Pesto, transfer it to an airtight container and keep it in the refrigerator for up to one week. For longer storage, consider freezing it. To do this effectively, pour a thin layer of olive oil over the top before sealing it. This will help preserve its vibrant color and fresh flavor. When you’re ready to use the frozen pesto, simply thaw it in the fridge overnight or mix it back into a warm dish until heated through. Can I substitute ingredients in Carrot Top Pesto? Absolutely! Carrot Top Pesto is highly versatile. If you don’t have pine nuts on hand, feel free to swap them
Easy Breezy Coconut Margarita Recipe for a Tropical Twist

The Easy Breezy Coconut Margarita is your ticket to a tropical getaway without ever leaving your kitchen. Imagine a refreshing blend of creamy coconut, zesty lime, and smooth tequila dancing on your palate like a hula dancer at sunset. This drink isn’t just a cocktail; it’s an experience, a mini-vacation in a glass that you can whip up in no time. Whether you’re hosting a backyard barbecue, enjoying a cozy night in, or simply daydreaming of sandy beaches, this Easy Breezy Coconut Margarita is perfect for any occasion. Each sip is a delicious escape, inviting you to relax and savor the moment, all while you bask in the delightfully smooth flavors that remind you of warm tropical breezes. Ingredients for Easy Breezy Coconut Margarita Here’s what you’ll need to make this delicious Easy Breezy Coconut Margarita: 1 cup coconut cream – Look for full-fat coconut cream for the richest flavor, or use light coconut cream for a lighter option. 1/2 cup tequila – A good quality blanco tequila works best; it enhances the refreshing aspect of the margarita. 1/4 cup fresh lime juice – Freshly squeezed lime juice is essential for that vibrant citrus zing; bottled versions just can’t compare. 1/4 cup agave syrup – This natural sweetener balances the tartness of lime juice beautifully; you can adjust the sweetness to your liking. ice – You want plenty of ice to keep your margarita nice and chilled. toasted coconut flakes – These provide a great garnish and a delightful crunch with every sip, adding an extra tropical vibe. lime wedges – Serve alongside for a fresh burst of flavor when needed. How to Make Easy Breezy Coconut Margarita Follow these simple steps to prepare this delicious Easy Breezy Coconut Margarita: Step 1: Gather Your Ingredients Before you dive in, make sure you have all your ingredients ready. This ensures you won’t be running around like a headless chicken halfway through the preparation. Step 2: Blend the Base In a blender, combine the coconut cream, tequila, fresh lime juice, and agave syrup. Blend until everything is beautifully mixed and creamy—just a minute or so should do it. Step 3: Ice, Ice, Baby Add a generous amount of ice to the blender. Continue blending until you reach a delightfully smooth consistency. You want it to be slushy but still pourable; think of how you’d want it for the tropics! Step 4: Prepare Your Glasses While the blender is working its magic, grab your favorite glasses. Rim them with lime juice and dip in toasted coconut flakes for that extra touch of glam and flavor. Trust me; this part is as fun as it sounds. Step 5: Pour and Garnish Pour the blended mixture into your prepared glasses, filling them to the brim. Top each drink with lime wedges for color and an extra zing, and don’t forget to showcase those lovely toasted coconut flakes. Step 6: Serve and Enjoy Time to indulge in your handiwork! Sip slowly, and let that tropical taste transport you to paradise with each mouthful. This tropical margarita pairs perfectly with spicy chips or your favorite nachos. Now that you have your Easy Breezy Coconut Margarita ready to go, it’s time for the important part: sharing it with friends (or keeping it all to yourself—no judgment here)! Whether you’re sipping on the patio or lounging in your living room, every moment will be a tropical escape. Cheers! Perfecting Easy Breezy Coconut Margarita Cooking Process Start by blending the coconut cream, tequila, lime juice, and agave syrup first. While blending, prepare your ice and garnishes to serve quickly while the margarita is nice and frosty. Add Your Touch to Easy Breezy Coconut Margarita Feel free to swap out tequila for rum or omit the agave syrup for a less sweet option. Extra lime zest or fresh mint can elevate the flavors and bring your creative flair to this drink. Storing & Reheating Easy Breezy Coconut Margarita This margarita is best enjoyed fresh, but you can store leftovers in the fridge for up to 24 hours. Just give it a good shake or stir before serving again to revive the flavors. I remember the first time I made an Easy Breezy Coconut Margarita for friends. Their reactions were priceless, and one even joked about changing her name to Margarita “Coconut” after that night. It felt like I’d unlocked a summer memory in a glass! FAQs About Easy Breezy Coconut Margarita What is Easy Breezy Coconut Margarita? The Easy Breezy Coconut Margarita is a tropical twist on the classic margarita that combines the creamy richness of coconut cream with the vibrant kick of tequila and fresh lime juice. It’s the perfect drink for summer gatherings, beach parties, or simply unwinding at home. This refreshing cocktail is easy to make and delivers a restaurant-quality experience right from your kitchen. With its blissful balance of flavors, the Easy Breezy Coconut Margarita is bound to become your new favorite. How do I make the Easy Breezy Coconut Margarita extra special? To elevate your Easy Breezy Coconut Margarita, consider enhancing the flavors with fresh mint leaves or a dash of lime zest. When blending, you could even throw in a handful of frozen fruit, like pineapple or mango, for added sweetness and a splash of color. Don’t forget to rim your glasses with toasted coconut for that extra flair. This little touch will have everyone wanting to try your version of this delightful cocktail. Can I make a non-alcoholic version of the Easy Breezy Coconut Margarita? Absolutely! To create a non-alcoholic version of the Easy Breezy Coconut Margarita, simply replace the tequila with coconut water or a splash of sparkling water for some fizz. Keep all other ingredients the same: coconut cream, lime juice, and agave syrup. This alternative maintains the refreshing tropical flavor while allowing everyone to enjoy it, regardless of their drinking preference, making it perfect for parties and gatherings. How long can I store the Easy Breezy Coconut Margarita? While the
Super Bowl Vegan Buffalo Cauliflower Wings Recipe for Game Day

Indulge your taste buds in a sensational experience with these SUPER BOWL Vegan Buffalo Cauliflower Wings. Imagine crispy-on-the-outside, tender-on-the-inside florets smothered in spicy buffalo sauce that brings just the right kick to your game day spread. The vibrant aroma wafts through your kitchen, making even the staunchest meat-lover perk up with curiosity. Picture this: You and your friends are gathered around the TV, the excitement of the Super Bowl filling the air, and what do you serve? These crowd-pleasing wings that are not only a feast for the eyes but also a guilt-free treat for your taste buds. Each bite bursts with flavor, giving you all the thrills of traditional buffalo wings without any of the animal products. Get ready to make this recipe your go-to for game day! Ingredients for SUPER BOWL Vegan Buffalo Cauliflower Wings Here’s what you’ll need to make this delicious SUPER BOWL Vegan Buffalo Cauliflower Wings: 1 medium cauliflower head – Fresh, firm, and free of blemishes for the best texture and flavor. 2 tbsp olive oil – Use a good quality extra virgin olive oil for added richness and health benefits. 1 cup buffalo sauce – Choose your favorite spicy sauce; the level of heat can be adjusted to your liking. 1 tsp garlic powder – Adds that essential garlicky punch that complements the buffalo sauce perfectly. 1 tsp paprika – For a hint of smokiness that enhances the overall flavor profile. 1 cup all-purpose flour – This creates the crispy coating that makes these wings irresistible. 1 cup non-dairy milk – Almond, soy, or oat milk work great; this helps to create a smooth batter. How to Make SUPER BOWL Vegan Buffalo Cauliflower Wings Follow these simple steps to prepare this delicious SUPER BOWL Vegan Buffalo Cauliflower Wings: Step 1: Preheat the Oven Preheat your oven to 450°F (232°C) and line a baking sheet with parchment paper. This will ensure that your wings are crispy and don’t stick, saving you the dreaded cleanup later. Step 2: Prepare the Cauliflower Cut the cauliflower into bite-sized florets. The smaller the pieces, the crispier they become. You’ll want to trim off the leaves and the stem, focusing on the beautiful, crunchy florets. Step 3: Make the Batter In a bowl, whisk together the flour, garlic powder, paprika, and a pinch of salt. Then, gradually add in the non-dairy milk until the mixture reaches a smooth, pancake-like batter consistency. This batter is your secret weapon for achieving that crispy coating. Step 4: Coat the Cauliflower Dip each cauliflower floret into the batter, making sure they are well-coated. Arrange them in a single layer on the prepared baking sheet, ensuring they don’t touch each other for optimal crispiness. Step 5: Bake and Flip Bake in the preheated oven for about 20 minutes, flipping them halfway through the cooking time. This helps both sides achieve that gorgeous golden-brown color and irresistible crunch. Step 6: Toss in Buffalo Sauce Remove the cauliflower from the oven and toss them in the buffalo sauce until fully coated. Return them to the oven for an additional 5 minutes. This final touch is where the magic happens! Now, you have these tasty, crispy SUPER BOWL Vegan Buffalo Cauliflower Wings ready to serve. Plate them up with some celery sticks and a vegan ranch dressing for an extra special touch. Trust me, even your non-vegan friends will be begging for seconds! Enjoy the game day spirit with every bite, and let your taste buds celebrate. Perfecting SUPER BOWL Vegan Buffalo Cauliflower Wings Cooking Process To achieve the best results with your SUPER BOWL Vegan Buffalo Cauliflower Wings, start by preheating your oven while you prepare the batter. Cut the cauliflower into bite-sized florets and mix the dry ingredients before gradually adding the non-dairy milk for a smooth batter. Add Your Touch to SUPER BOWL Vegan Buffalo Cauliflower Wings Feel free to get creative! Swap out the buffalo sauce for your favorite barbecue sauce or try adding a splash of soy sauce and sesame oil for an Asian twist. You can even toss in some finely chopped green onions or nutritional yeast for some extra flavor. Storing & Reheating SUPER BOWL Vegan Buffalo Cauliflower Wings To store your SUPER BOWL Vegan Buffalo Cauliflower Wings, place any leftovers in an airtight container and refrigerate for up to three days. Reheat in the oven at 350°F, ensuring they regain their crispiness without turning soggy. Sharing my first experience with making SUPER BOWL Vegan Buffalo Cauliflower Wings brings a smile! Friends were skeptical at first, but their reactions after the first bite were priceless, creating a fun food memory that I cherish. FAQs About SUPER BOWL Vegan Buffalo Cauliflower Wings What is SUPER BOWL Vegan Buffalo Cauliflower Wings? SUPER BOWL Vegan Buffalo Cauliflower Wings are a delicious, plant-based alternative to traditional chicken wings. Made from fresh cauliflower coated in a flavorful batter and tossed in spicy buffalo sauce, these tasty bites are baked to perfection, resulting in a crispy exterior and tender interior. They offer a perfect balance of heat and flavor, making them a popular choice for game day snacks, parties, or casual weeknight dinners. Easy to prepare and packed with flavor, they’ll impress both vegan and non-vegan guests alike. How can I customize my SUPER BOWL Vegan Buffalo Cauliflower Wings? You can customize your SUPER BOWL Vegan Buffalo Cauliflower Wings by experimenting with different sauces and seasonings. Consider swapping the buffalo sauce for a barbecue or teriyaki glaze for a sweeter flavor. You might also add spices like cayenne pepper or smoked paprika for an extra kick. Toss in some nutritional yeast for a cheesy finish or garnish with green onions or cilantro for added freshness. The options are endless, allowing you to create a dish that suits your palate perfectly! Can I make SUPER BOWL Vegan Buffalo Cauliflower Wings ahead of time? Absolutely! You can prepare your SUPER BOWL Vegan Buffalo Cauliflower Wings ahead of time. Simply follow the recipe up to the point of