
Super Bowl Baked Buffalo Cauliflower Wings for Your Next Party

Diving into a plate of SUPER BOWL Baked Buffalo Cauliflower Wings is like a flavor explosion that hits you right between the taste buds. Imagine biting into crispy, spicy, and oh-so-satisfying florets that are bathed in rich buffalo sauce, leaving you dreaming about the next mouthful before you even finish the last. Trust me, your taste buds are in for an incredible ride with these crowd-pleasers, perfect for game day or any occasion that calls for a touch of delicious fun. Now, picture this: It’s the Super Bowl Sunday, and the atmosphere crackles with excitement. Friends gather around, drinks in hand, and the excitement of the big game is palpable. But hold up; what’s a party without a show-stopping appetizer? Enter the SUPER BOWL Baked Buffalo Cauliflower Wings. Not only do they steal the spotlight with their mouthwatering East meets West flavors, but they also make your heart flutter with every bite. The aroma fills your kitchen, leaving everyone asking, “What’s that amazing smell?” Let’s get ready to bake! Ingredients for SUPER BOWL Baked Buffalo Cauliflower Wings (Crowd-Pleasing Appetizer) Here’s what you’ll need to make this delicious SUPER BOWL Baked Buffalo Cauliflower Wings (Crowd-Pleasing Appetizer): 1 medium head cauliflower – Look for a fresh, firm head with tightly packed florets for the best texture and flavor. About 4 cups of florets will do the trick. 2 tbsp olive oil – A good drizzle helps the spices stick to the cauliflower and gives a nice crunch when roasted. Use extra virgin for a rich flavor. 1/2 cup buffalo sauce – Opt for your favorite brand or homemade for a tangy kick that embodies the spirit of buffalo wings without all the heaviness. 1 tsp garlic powder – This adds an irresistible depth of flavor that infuses every bite with a hint of savory goodness. 1 tsp paprika – Not just for color, but it brings in a mild sweetness and smokiness that works wonders with the spice. Salt and pepper to taste – Simple seasonings that elevate all the other flavors in the dish. Always taste before serving to ensure it’s just right. How to Make SUPER BOWL Baked Buffalo Cauliflower Wings (Crowd-Pleasing Appetizer) Follow these simple steps to prepare this delicious SUPER BOWL Baked Buffalo Cauliflower Wings (Crowd-Pleasing Appetizer): Step 1: Preheat the Oven Set your oven to a blazing 450°F (230°C). Line a baking sheet with parchment paper so those wings don’t stick and you get an easy cleanup. Step 2: Prepare the Cauliflower Break down your cauliflower into bite-sized florets. Channel your inner chef and aim for even pieces to ensure they roast uniformly. Step 3: Season the Florets In a large bowl, toss the cauliflower florets with olive oil, garlic powder, paprika, salt, and pepper. You want a good coating, so make sure every floret gets its share of love (and seasoning). Step 4: Bake the Cauliflower Spread the seasoned cauliflower in a single layer on the prepared baking sheet. Bake for 20 minutes, or until they are golden brown and irresistibly crispy. Step 5: Add the Buffalo Sauce Once roasted, take the cauliflower out and toss them in a bowl with buffalo sauce. Make sure they are fully coated; after all, it’s the buffalo sauce that makes these wings sing! Step 6: Finish Baking Return the saucy florets back onto the baking sheet and bake for another 10 minutes. This gives them that extra crispiness that you won’t want to miss. Before serving, take a moment to admire your creation. These SUPER BOWL Baked Buffalo Cauliflower Wings are the kind of dish that makes you feel like a kitchen rockstar. Serve them hot with your favorite dipping sauce, perhaps some ranch or blue cheese, because what’s a wing (even a cauliflower one) without a bold dip? Enjoy the game and the compliments that come with it! Perfecting SUPER BOWL Baked Buffalo Cauliflower Wings (Crowd-Pleasing Appetizer) Cooking Process Start by preheating your oven to 450°F (230°C) while you prepare the ingredients. Toss the cauliflower florets with olive oil and spices, then roast until golden before adding the buffalo sauce for optimal flavor. Add Your Touch to SUPER BOWL Baked Buffalo Cauliflower Wings (Crowd-Pleasing Appetizer) Customize your wings by adding a sprinkle of Parmesan cheese, or for a twist, try other sauces like BBQ or honey mustard for a unique flavor profile. The possibilities are endless. Storing & Reheating SUPER BOWL Baked Buffalo Cauliflower Wings (Crowd-Pleasing Appetizer) Store any leftovers in an airtight container in the fridge for up to three days. To reheat, pop them in a preheated oven at 375°F (190°C) for about 10 minutes for maximum crunchiness. After hosting a Super Bowl party where these wings disappeared faster than a halftime show, I knew I had stumbled onto something special. Everyone raved about them and requested the recipe, turning my casual cooking into a crowd-pleasing tradition. FAQs About SUPER BOWL Baked Buffalo Cauliflower Wings (Crowd-Pleasing Appetizer) What is SUPER BOWL Baked Buffalo Cauliflower Wings (Crowd-Pleasing Appetizer)? SUPER BOWL Baked Buffalo Cauliflower Wings (Crowd-Pleasing Appetizer) are a delicious and healthier alternative to traditional chicken wings. They feature crispy roasted cauliflower florets tossed in a spicy buffalo sauce, making them a perfect snack for game day or any gathering. The recipe is easy to prepare using simple ingredients and provides a satisfying crunch that everyone at your party will love. These wings are not just tasty; they are also vegetarian and packed with flavor, making them a hit among diverse diets. How do I make SUPER BOWL Baked Buffalo Cauliflower Wings (Crowd-Pleasing Appetizer) spicier? To add extra heat to your SUPER BOWL Baked Buffalo Cauliflower Wings (Crowd-Pleasing Appetizer), you can increase the buffalo sauce quantity. Alternatively, mix in some cayenne pepper or a dash of hot sauce into the buffalo sauce for added kick. If you love spice, consider marinating the florets in the sauce for a few minutes before roasting, ensuring the heat penetrates every bite. Just be cautious with the spice levels, as it
How to Caramelize Onions Perfectly for Ultimate Flavor
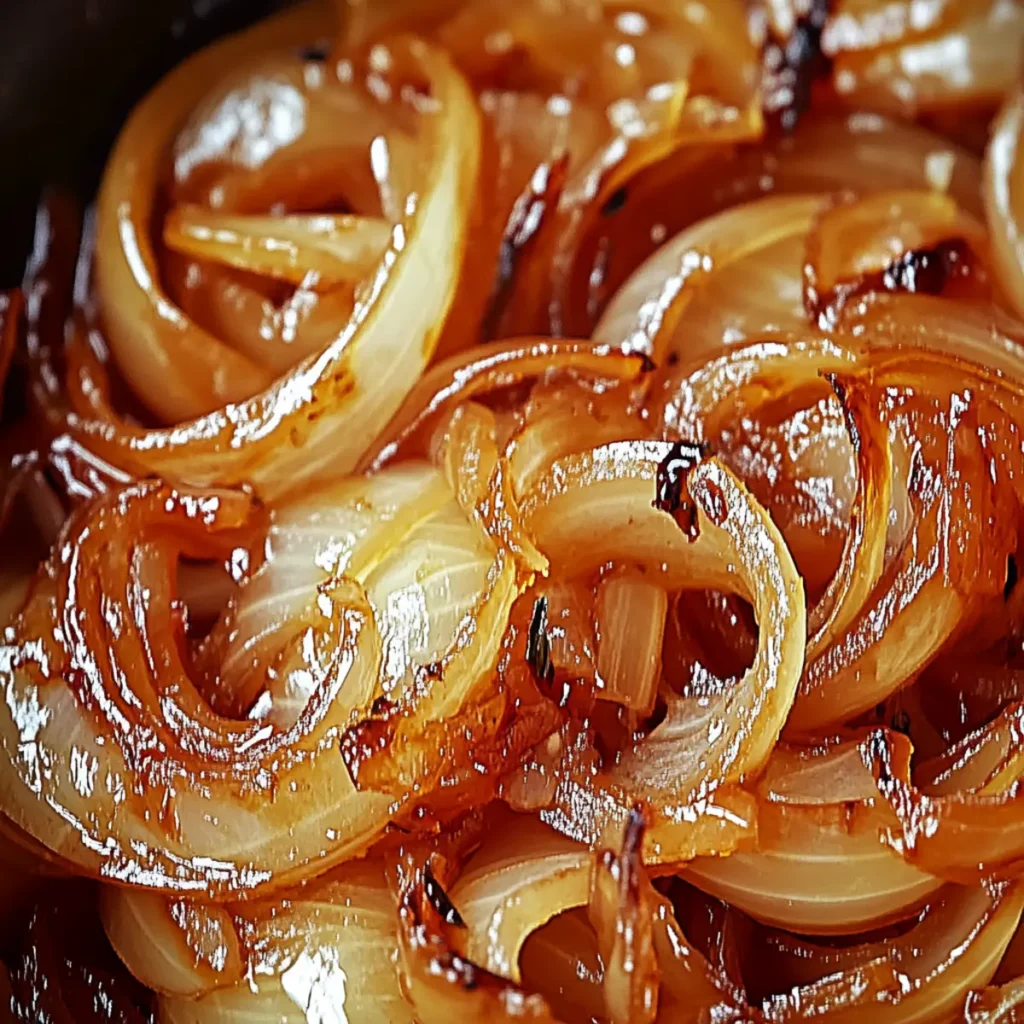
The aroma of caramelized onions wafting through the kitchen is like a warm hug; it welcomes you home after a long day. There’s something magical about those sweet, golden strands that transform any dish they touch into a gourmet experience. If you’ve ever wondered how to caramelize onions perfectly for ultimate flavor, you’ve come to the right place! Caramelizing onions takes a little time, but with the right technique, the end result will have you swooning over the sweet, rich taste you’ll never want to miss again. Perfect for topping burgers, enhancing pasta dishes, or just served alongside a delectable cheese platter, knowing how to caramelize onions is a game-changer in your culinary repertoire. Ingredients for How to Caramelize Onions Here’s what you’ll need to make this delicious How to Caramelize Onions: 3 medium yellow onions – The star of the show, choose firm, unblemished onions for the sweetest and best flavor. 2 tbsp unsalted butter – Crucial for that rich, comforting flavor, plus it helps in the browning process. 1 tbsp olive oil – Provides a lovely depth of flavor; you can substitute with any neutral oil if needed. 1/2 tsp salt – A pinch will balance the sweetness of the onions beautifully. 1 tsp sugar (optional) – Adding sugar midway can enhance sweetness, perfect for sweeter applications. How to Make How to Caramelize Onions Follow these simple steps to prepare this delicious How to Caramelize Onions: Step 1: Slice the Onions Begin by peeling the onions and slicing them into thin half-moons. Aim for about a quarter-inch thickness; consistency is key for even cooking. Step 2: Heat the Skillet In a large, heavy-bottomed skillet, heat the butter and olive oil over medium heat until the butter is melted and begins to bubble. This delightful mixture will help with the caramelization by adding rich flavor. Step 3: Add the Onions Toss the sliced onions into the skillet and sprinkle in the salt. Give everything a good stir to coat the onions evenly with the buttery goodness. Step 4: Cook Low and Slow This is where the magic happens. Cook the onions slowly over medium to low heat for about 30 to 40 minutes, stirring occasionally. Patience is essential here; you want them to brown beautifully without burning. Step 5: Sweeten the Deal (Optional) If you prefer a sweeter flavor profile, add the sugar halfway through cooking. This step is optional but highly recommended if you’re looking to amplify the natural sweetness of the onions. Step 6: Serve and Enjoy Once the onions are golden brown and fragrant, remove them from the heat. Serve them warm as a topping on your favorite dishes, or simply enjoy them on their own. There you have it! By following these simple steps, you’ll not only learn how to caramelize onions to perfection but also unlock endless possibilities in creating incredible flavors in your meals. Whether you’re hosting a dinner party, packing up food for meal prep, or you just have a craving for something savory and sweet, these caramelized onions are sure to elevate your culinary creations. So, what are you waiting for? Grab those onions and let the caramelization commence! Perfecting How to Caramelize Onions Cooking Process Before diving in, start by slicing your onions with intention. Melt the butter and olive oil together first, inviting a rich aroma before introducing the onions. It’s all about keeping it steady to coax out that golden sweetness. Add Your Touch to How to Caramelize Onions Feel free to sprinkle in a pinch of thyme or rosemary to elevate your caramelized onions. For a sweet twist, consider adding balsamic vinegar or even a splash of red wine as they cook. Storing & Reheating How to Caramelize Onions Once cooled, store your caramelized onions in an airtight container. They can be refrigerated for about a week or frozen for a couple of months. Reheat them gently on the stove to bring back their delightful texture. The first time I caramelized onions, I nearly set off the fire alarm! But when I finally nailed the technique, my family couldn’t get enough of the sweet, buttery goodness. FAQs About How to Caramelize Onions What is How to Caramelize Onions? How to caramelize onions is the process of cooking onions slowly over low heat until they transform into a sweet, golden-brown delicacy. This cooking method helps to unlock the natural sugars in the onions, resulting in a rich and deeply flavored dish. It’s a foundational technique used in various recipes, from French onion soup to sautéed toppings for burgers and steaks. Mastering this skill elevates everyday meals and adds sophistication without complicated ingredients. Why are my onions not caramelizing? If your onions are not caramelizing, the most likely culprit is the heat level. Cooking them on too high of a heat can lead to burning on the outside while leaving the inside too firm. To achieve the perfect caramelization, maintain a medium to low heat and be patient. Additionally, ensure you’re using enough fat, like butter or olive oil, to help facilitate the release of sugars. Stirring occasionally prevents sticking and promotes even browning. Can I use different types of onions to caramelize? Absolutely! While yellow onions are the go-to choice for caramelizing due to their balance of sweetness and flavor, you can experiment with other varieties as well. Sweet onions, like Vidalia or Walla Walla, can give an even sweeter outcome, while red onions will lend a milder, slightly fruity flavor. Each type brings its unique character, so feel free to mix them up for an interesting twist! How long does it take to caramelize onions? Caramelizing onions typically takes about 30 to 40 minutes. It’s essential to be patient during this process to allow the sugars to develop fully. If you want a deeper, richer flavor, you can even extend the cooking time to an hour. Keep an eye on them and stir occasionally to prevent burning, ensuring they cook evenly and transform into those delicious,
Delicious Beer Dip Recipe: Perfect for Parties and Gatherings

The moment you dip into a bowl of homemade Beer Dip, you enter a flavor fiesta! This creamy delight seamlessly blends the richness of cream cheese and the sharpness of cheddar with the beer’s effervescent touch, creating a dip that dances on your taste buds. Perfect for parties or just a cozy night in, it’s a crowd-pleaser that transforms any mundane snack into a celebration. Picture this: you’ve just arrived at a gathering, and the first thing that hits you is the heavenly scent of savory goodness wafting through the air. The Beer Dip awaits, calling you to dive in with your favorite chips. Whether you’re planning a game night, a casual barbecue, or simply a TV binge, this dip elevates even the most simple occasions into something special. Ingredients for Beer Dip Here’s what you’ll need to make this delicious Beer Dip: 8 oz cream cheese – Make sure it’s softened for easy mixing; use low-fat options for a lighter version if desired. 1 cup sour cream – This adds a creamy tanginess that balances the flavors perfectly. 1 cup shredded sharp cheddar cheese – A must for that rich, cheesy flavor. Opt for freshly shredded for better melting qualities. 1/2 cup beer – Choose a beer that you enjoy drinking; it will enhance the dip’s flavor. 2 green onions – Finely chopped, these add a fresh, vibrant note that elevates every bite. 1 tsp garlic powder – For that delicious savory depth; you can substitute with fresh minced garlic if preferred. How to Make Beer Dip Follow these simple steps to prepare this delicious Beer Dip: Step 1: Gather Your Ingredients Before you start, gather all your ingredients and let them come to room temperature. This will make blending a breeze and help all those flavors meld together beautifully. Step 2: Mix the Cream Base In a large bowl, combine the softened cream cheese and sour cream. Using a hand mixer or a sturdy spatula, blend them until they’re creamy and smooth, with no lumps. Step 3: Add Flavorful Ingredients Fold in the shredded cheddar cheese and garlic powder. Make sure everything is evenly distributed, so every bite packs the same flavorful punch. Step 4: Incorporate the Beer Gradually add the beer to your mixture while stirring continuously. This gentle mixing lets the beer blend seamlessly, creating a luscious texture. Step 5: Add the Green Onions Carefully stir in the chopped green onions. They give a lovely crunch and freshness, making your Beer Dip even more enticing. Step 6: Chill Before Serving Cover the bowl with plastic wrap and pop it into the fridge for at least one hour. This chilling time allows the flavors to develop, ensuring every bite is packed with savory goodness. Serve your Beer Dip chilled alongside crispy tortilla chips, fresh veggies, or soft pretzels. It’s the perfect accompaniment for all your gatherings, and trust me, it will quickly become a favorite among your friends and family! Enjoy the cheers of “What’s in this magic dip?” as you watch them dive in for seconds. This showstopping Beer Dip delivers restaurant-quality results using simple ingredients you probably already have at home. The perfect balance of textures and flavors creates an unforgettable dining experience that will have everyone asking for seconds. Picture-perfect presentation with vibrant colors makes this dish absolutely Instagram-worthy and guaranteed to impress any dinner guest. Incredibly versatile recipe that works beautifully for weeknight dinners, meal prep, special occasions, or even outdoor entertaining sessions. Perfecting Beer Dip Cooking Process Start by ensuring all your ingredients are at room temperature for easy blending. Mix the cream cheese with sour cream first, then fold in the cheese and seasonings before gradually incorporating the beer to achieve the ideal creamy consistency. Add Your Touch to Beer Dip Feel free to experiment by swapping out the sharp cheddar for a spicy pepper jack or adding in some diced jalapeños for that extra kick. You can also mix in some crispy bacon bits if you’re feeling indulgent. Storing & Reheating Beer Dip Store any leftover Beer Dip in an airtight container in the fridge for up to three days. To reheat, gently warm it in the microwave, stirring occasionally, until creamy again. Avoid overheating to keep that perfect texture. I still remember that one game night where the Beer Dip stole the spotlight. Friends couldn’t stop raving about it, and I couldn’t help but feel like a cooking genius. The secret? Making sure to let it chill really paid off! FAQs About Beer Dip What is Beer Dip? Beer Dip is a creamy, flavorful dip made from simple ingredients like cream cheese, sour cream, cheddar cheese, and, of course, beer. This delightful appetizer is perfect for parties, game nights, or gathering with friends. The combination of savory cheese and the unique tang of beer creates a rich flavor, making it a crowd-pleaser that pairs beautifully with crackers, veggies, or pretzels. It’s easy to prepare, requiring just a few minutes of mixing before chilling in the fridge. How can I customize my Beer Dip? You can easily personalize your Beer Dip by swapping ingredients or adding extras to suit your taste. For a spicier twist, substitute the sharp cheddar with pepper jack cheese or include diced jalapeños for an extra kick. If you love savory flavors, consider mixing in crispy bacon bits or caramelized onions. Herbs like chives or dill can also freshen up the dip. The beauty of Beer Dip lies in its versatility, so feel free to experiment and make it your own. What do I serve with Beer Dip? Beer Dip pairs wonderfully with a variety of snacks and dippers. Classic choices include tortilla chips, pretzel crisps, or fresh vegetable sticks like carrots, celery, and bell peppers. For a fun twist, consider serving it with toasted baguette slices or soft bread rolls. The creamy flavor of the dip complements the crunch of these snacks, creating a satisfying experience. You can also set up a dip station
Easy Garlic Butter Steak Bites Recipe Ready in 20 Minutes
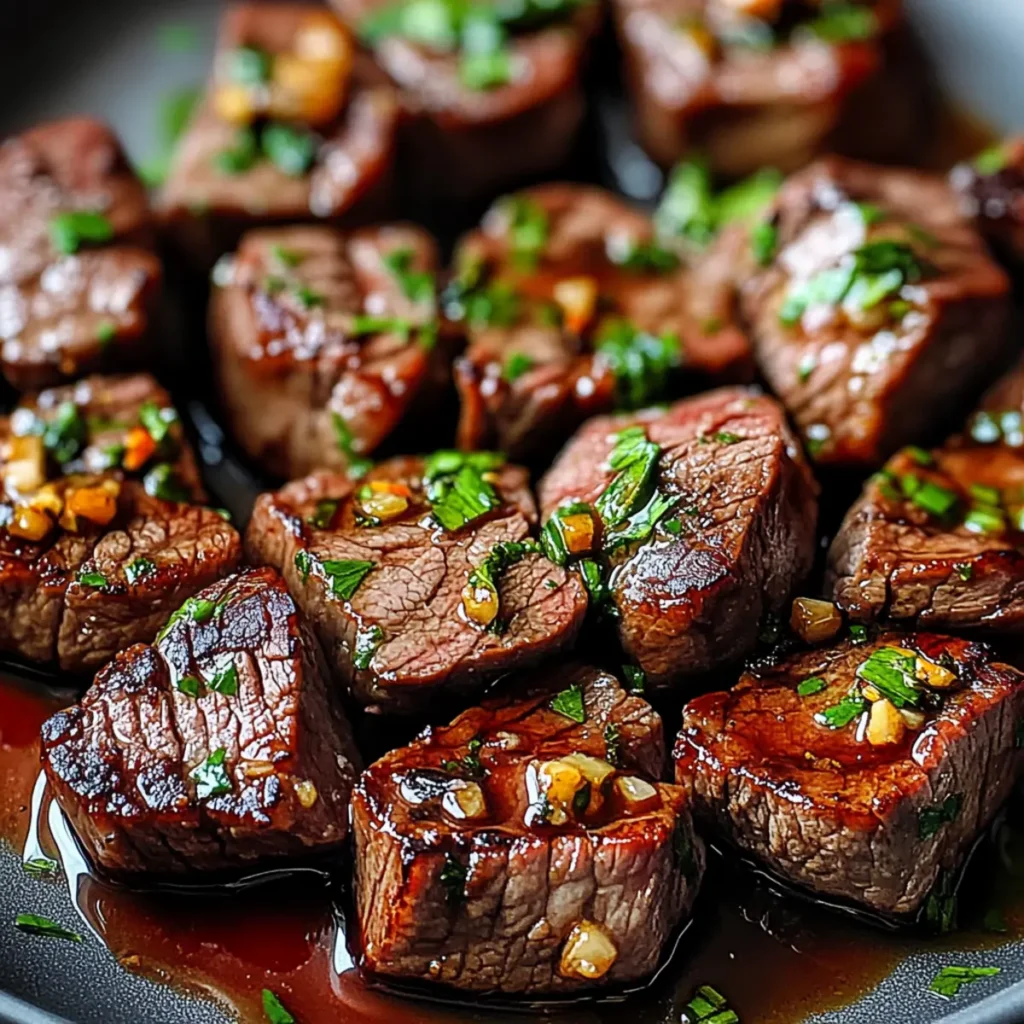
The aroma of sizzling steak fills the air, inviting everyone to gather around the kitchen. Picture bite-sized pieces of juicy steak, coated in rich garlic butter, glistening with flavor – that’s what Garlic Butter Steak Bites are all about. This dish is perfect for when you’re craving something hearty yet effortlessly delicious, turning an ordinary dinner into a gourmet experience. Imagine biting into a perfectly seared morsel, where the garlic butter melds beautifully with the juicy steak. The simplicity of the ingredients is deceptive; anyone who tries these will swear you’ve spent hours slaving over the stove. Whether it’s a cozy family night, a casual date, or just a Friday treat, these Garlic Butter Steak Bites bring joy to any occasion, making them an instant favorite. Ingredients for Garlic Butter Steak Bites Here’s what you’ll need to make this delicious Garlic Butter Steak Bites: 1 lb sirloin or ribeye steak – Choose a tender cut for the best flavor and texture. Both cuts are ideal, but ribeye offers extra marbling for juiciness. 3 tbsp unsalted butter – Using unsalted butter allows you to control the salt level better. It also enhances the rich, creamy flavor you want in the sauce. 4 cloves fresh garlic, minced – Fresh garlic gives a robust flavor that jars open memories of happy family dinners. 2 tbsp olive oil – This helps achieve a beautiful sear on the steak while adding a subtle richness to the dish. Salt and pepper to taste – Essential seasonings that elevate the natural flavors of the steak. 2 tbsp fresh parsley, chopped – A sprinkle of this vibrant herb adds a fresh touch and brightens the presentation. How to Make Garlic Butter Steak Bites Follow these simple steps to prepare this delicious Garlic Butter Steak Bites: Step 1: Prepare the Steak Begin by cutting the sirloin or ribeye steak into 1-inch cubes. Generously season these pieces with salt and pepper, coating them well for that delicious flavor. Step 2: Sear the Steak In a large skillet over medium-high heat, pour in the olive oil and let it heat up. Once shimmering, add the steak bites in a single layer. Sear for 2-3 minutes per side until they turn beautifully browned, soaking in all the savory goodness. Step 3: Add Garlic and Butter Lower the heat to medium-low and introduce the unsalted butter and minced garlic to the skillet. Stir gently, allowing the butter to melt and envelop the steak bites in rich flavor. Step 4: Finish Cooking Continue cooking for an additional minute until the garlic becomes fragrant and golden. The buttery sauce will cling to the bites, creating a mouthwatering glaze that promises bursts of flavor in every bite. Step 5: Serve with Style Remove from heat and transfer the garlic butter steak bites to a serving platter. Sprinkle with the chopped fresh parsley for a pop of color and a hint of freshness. Step 6: Enjoy! Now comes the best part! Serve these delightful bites with toothpicks or just your hands (you can’t resist) and watch as everyone devours them in seconds. Whether you serve these as an appetizer, main dish, or even toss them into a salad, the versatility of Garlic Butter Steak Bites guarantees they will be received with joy and delight. Perfecting Garlic Butter Steak Bites Cooking Process To create the ultimate Garlic Butter Steak Bites, start by searing the steak cubes in a hot skillet for that perfect crust. Once browned, lower the heat and add butter and garlic to infuse delicious flavors before serving. Add Your Touch to Garlic Butter Steak Bites Feel free to get creative with flavors! Swap out sirloin for filet mignon or ribeye, and toss in herbs like thyme or rosemary for a fresh twist. Or for a kick, add a sprinkle of red pepper flakes. Storing & Reheating Garlic Butter Steak Bites Store any leftovers in an airtight container in the fridge for up to three days. Reheat in a skillet over medium heat, adding a little extra butter to bring back the rich flavors. There’s a story behind these Garlic Butter Steak Bites that never fails to make me smile. The first time I made them, my friend proclaimed it the “best thing ever!” while sneaking extra bites straight off the serving plate. It reminded me that good food always brings out the best company. FAQs About Garlic Butter Steak Bites What is Garlic Butter Steak Bites? Garlic Butter Steak Bites are tender chunks of steak sautéed in a luscious garlic butter sauce. This dish combines the rich flavors of sirloin or ribeye steak with the aromatic goodness of fresh garlic and melted butter. Perfect for a quick weeknight meal or an impressive dinner party dish, these steak bites provide a delightful flavor experience without complicated steps. The best part? They are ready in just 20 minutes, making them a go-to recipe for any occasion. How do I store leftovers of Garlic Butter Steak Bites? Storing leftovers of Garlic Butter Steak Bites is easy! Let them cool down completely before transferring them to an airtight container. They can be kept in the refrigerator for up to three days. To reheat, place them in a skillet over medium heat, adding a touch of butter to revive the flavors. This method keeps the steak tender and juicy, ensuring you enjoy every last bite the next time around. Can I customize Garlic Butter Steak Bites with different ingredients? Absolutely! One of the joys of Garlic Butter Steak Bites is their versatility. You can swap out sirloin for ribeye or even filet mignon for a more luxurious touch. If you’re looking to spice things up, consider adding herbs like rosemary or thyme. For a kick, a sprinkle of red pepper flakes adds heat without overpowering the savory butter-garlic combo. Feel free to experiment for a unique twist! What sides pair well with Garlic Butter Steak Bites? Garlic Butter Steak Bites pair beautifully with a variety of sides. For a
Delicious Refreshing Green Juice Recipe for Ultimate Hydration
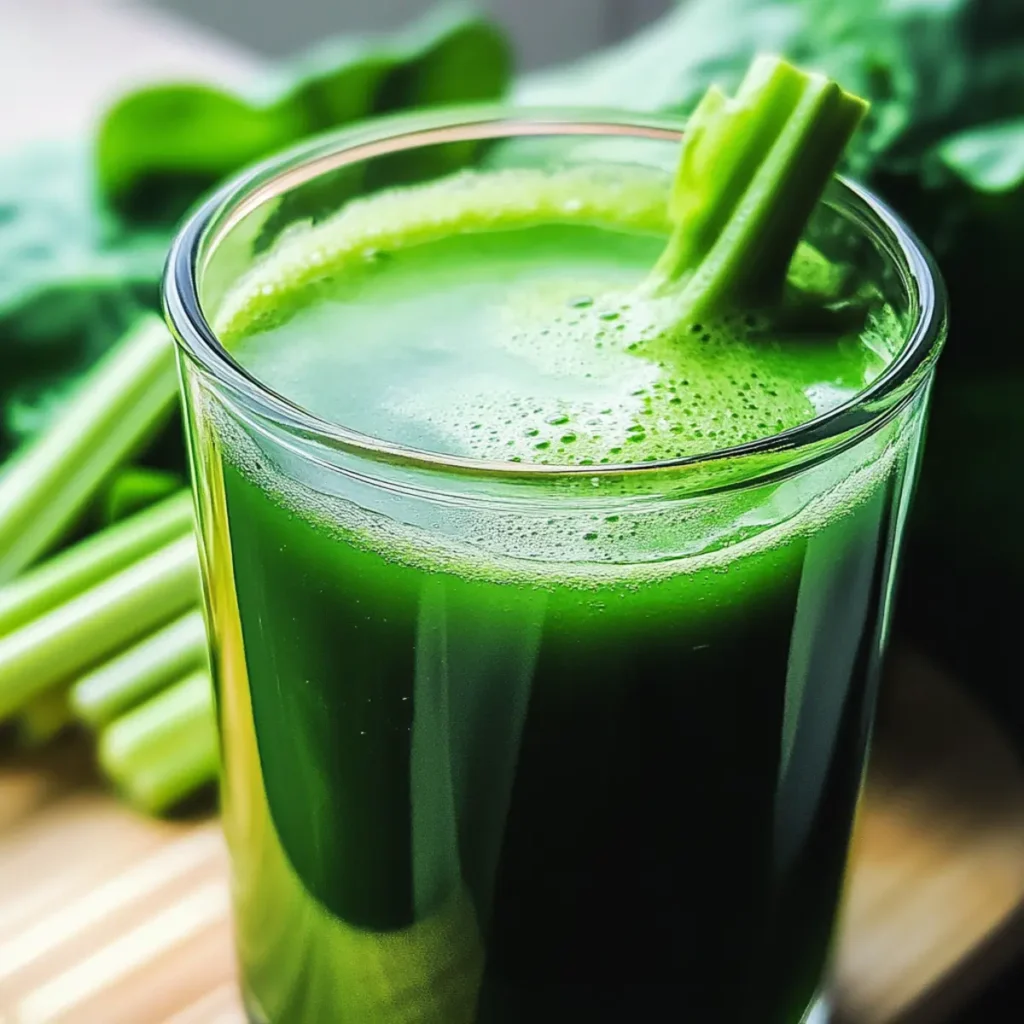
There’s nothing quite like sipping on a refreshing green juice on a hot day. Just imagine the flavors swirling around in your glass—crisp cucumber, a hint of zingy ginger, and that invigorating green goodness from kale. With each sip, you’re not just hydrating; you’re packing your body with nutrients that’ll make you feel like you can conquer the world. This Refreshing Green Juice Recipe transforms humble ingredients into a vibrant drink that’s as rejuvenating as a splash of cold water on your face after a long run. Now, I don’t know about you, but green juice has this magical quality that can make you feel like a wellness guru. It’s like the drink version of wearing yoga pants while wondering where your next nap will be. Whether you’re gearing up for a busy day or winding down your week, this juice is your new best friend. Plus, it’s so simple to whip up, you’ll wonder why you didn’t start making it sooner! Ingredients for Refreshing Green Juice Recipe Here’s what you’ll need to make this delicious Refreshing Green Juice Recipe: 2 cups kale – Rich in vitamins A, C, and K, kale brings that earthy flavor and vibrant green color to your juice; try to choose fresh, dark leaves. 1 medium cucumber – Adds a refreshing crunch and balances the flavors beautifully. Pick one that’s firm and without blemishes for the best taste. 1 medium apple – The apple brings natural sweetness to the mix; opt for a tart variety like Granny Smith for a more zesty kick. 1/2 lemon – Fresh lemon juice adds brightness and acidity that enhances the overall flavor profile. 1-inch piece of ginger – This spicy root gives your juice a delightful kick! Fresh ginger root packs the most punch, so skip the powdered stuff. 1 cup coconut water (or regular water) – Coconut water hydrates while adding a subtle sweetness; use regular water if you prefer a lighter version. How to Make Refreshing Green Juice Recipe Follow these simple steps to prepare this delicious Refreshing Green Juice Recipe: Step 1: Wash your greens It’s time to give those greens a bath! Rinse the kale thoroughly under cool running water to remove any dirt or residue. Make sure to dry them well before chopping. Step 2: Chop the ingredients Start by chopping the kale into manageable pieces. Slice the cucumber and apple, and peel the ginger. The smaller the pieces, the easier it’ll be for your blender, and the smoother your juice will be! Step 3: Blend it all together In your trusty blender, combine the kale, cucumber, apple, ginger, and lemon juice. Pour in the coconut water, and blend on high until everything turns into a luscious green concoction. If it’s too thick for your liking, add a bit more water until it reaches your desired consistency. Step 4: Strain for a smoother finish If you prefer a juice without any pulp, strain the mixture through a fine-mesh sieve or cheesecloth into a large bowl or pitcher. This step is optional, but it does give you that silky-smooth texture. Step 5: Serve and enjoy Pour the juice into tall glasses over ice, and here’s where you can get creative! Garnish with a slice of cucumber or a sprig of fresh mint for that Instagram-worthy touch. Cheers to your health! This Refreshing Green Juice Recipe isn’t just a powerhouse of nutrients; it’s a delight for the senses! You’ve got the visual appeal of vibrant greens and the invigorating aroma that fills your kitchen. It’s the perfect pick-me-up whether you’re starting your day, cooling down in the afternoon heat, or simply enjoying a light snack. As you sip your way through this gorgeous glass of green goodness, remember that hydration is key, and this juice does the trick while feeling downright indulgent. The balance of flavors—earthy kale, sweet apple, zesty lemon, and a pungent kick from ginger—means you’ll be going back for seconds (or thirds!) in no time. So why not give it a try today? You might just find yourself channeling your inner health guru, feeling refreshed and vibrant—ready to tackle whatever life throws your way! Perfecting Refreshing Green Juice Recipe Cooking Process Start by washing all your greens and chopping them to ensure they blend beautifully. Combine the kale, cucumber, apple, ginger, and lemon juice in the blender, adding coconut water for a creamy balance. Blend until smooth, adjusting water as needed, and strain for a silky finish. Add Your Touch to Refreshing Green Juice Recipe Feel free to customize your Refreshing Green Juice Recipe by swapping kale with spinach for a milder flavor or adding a handful of fresh mint for an unexpected twist! Experiment with different fruits like pineapple or berries to elevate the sweetness. Storing & Reheating Refreshing Green Juice Recipe Store your freshly made juice in an airtight container in the refrigerator for up to 48 hours to maintain maximum freshness. Give it a good shake before serving, as ingredients may settle. Avoid reheating since it’s best enjoyed chilled! I remember the first time I served this Refreshing Green Juice Recipe at a family gathering. My cousin, a self-proclaimed health guru, proclaimed it “liquid gold,” and I honestly thought I might faint from pride! FAQs About Refreshing Green Juice Recipe What is Refreshing Green Juice Recipe? The Refreshing Green Juice Recipe is a delightful blend of nutrient-rich ingredients designed to energize and hydrate. This vibrant juice typically features kale, cucumber, apple, ginger, and a splash of lemon juice. It’s a perfect way to incorporate greens into your diet without compromising on flavor. When you whip up this juice, you’re essentially creating a delicious health potion that not only quenches your thirst but also packs a powerful nutritional punch. How can I customize the Refreshing Green Juice Recipe? You can easily customize the Refreshing Green Juice Recipe to suit your taste preferences. For a milder flavor, substitute kale with spinach, which adds a touch of sweetness. Want to boost the
Creamy Avocado Crema Recipe: Easy & Delicious Dip Idea
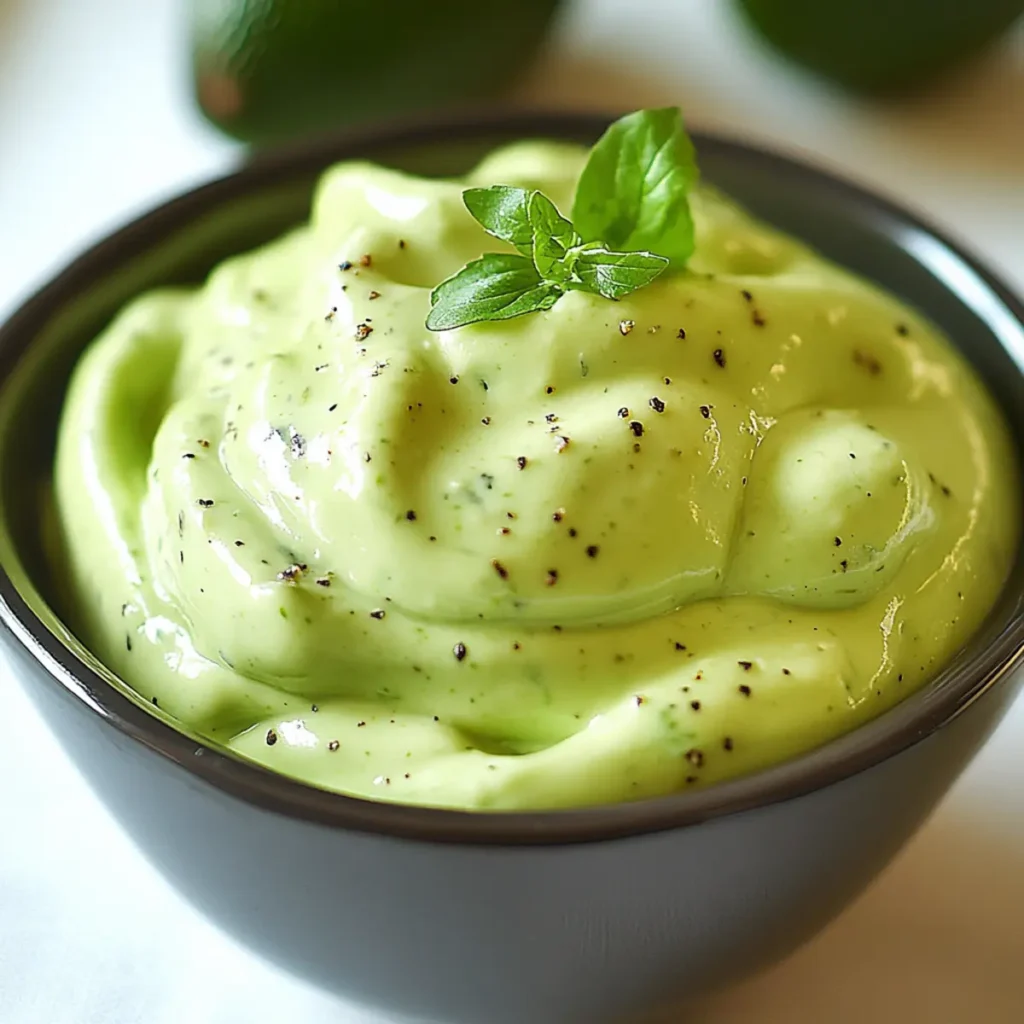
Ah, the delightful world of Avocado Crema! This creamy concoction cuddles your taste buds with its velvety texture and zesty kick, making everything from tacos to tortilla chips sing with joy. Imagine a drizzle of this luscious green goodness over your favorite dishes – it’s like sunshine on a plate, bringing instant cheer to any meal. But wait, there’s a story here! Many moons ago, I experimented with different dipping sauces at a friend’s cookout. Little did I know that a simple blend of ripe avocados, zesty lime, and a pinch of garlic would transform our gathering. As friends dipped their chips into the vibrant green mix, the air was filled with laughter and compliments, proving that sometimes, the simplest recipes leave the biggest impression. Ingredients for Avocado Crema Here’s what you’ll need to make this delicious Avocado Crema: 2 ripe avocados – Choose avocados that yield slightly to pressure for the perfect creaminess. 2 tablespoons fresh lime juice – Fresh lime juice adds a vibrant tang, brightening the flavor profile. 1 garlic clove – One clove offers just the right balance of garlic flavor without overwhelming the crema. ¼ cup fresh cilantro (optional) – Adds a burst of freshness; feel free to omit if you’re not a cilantro fan. ½ cup sour cream or Greek yogurt – Both options provide creaminess; Greek yogurt adds a tangy twist. Salt and pepper to taste – Enhances all the flavors; a must for any dish, really. How to Make Avocado Crema Follow these simple steps to prepare this delicious Avocado Crema: Step 1: Prepare Your Ingredients Begin by chopping your ripe avocados in half, removing the pit, and scooping the green goodness into a blender. Don’t forget to peel your garlic clove, as it will lend that much-needed zesty flavor to your crema. Step 2: Blend It Up In your food processor or blender, combine the scooped-out avocados with fresh lime juice, garlic, and cilantro (if using). Add the sour cream or Greek yogurt next, followed by a sprinkle of salt and pepper. Blend everything until it reaches a smooth consistency that resembles pure heaven. Step 3: Taste and Adjust Before you get too excited, taste your creamy creation. Does it need a little more salt? Perhaps a splash more lime juice? Adjust the seasonings as desired. This is where you can personalize your Avocado Crema to your heart’s content. Step 4: Chill for Maximum Flavor For an unbeatable taste experience, consider chilling your crema in the refrigerator for about 30 minutes. This will allow all the flavors to mingle and develop, much like at a good dinner party! Step 5: Serve It Up Bring it to the table and watch your friends’ eyes light up! Spoon your Avocado Crema into a lovely dish, and don’t be shy about serving it alongside chips, tacos, or even a hearty bowl of chili. Now, go forth and revel in the creamy, dreamy world of Avocado Crema, where every scoop brings a smile and a whole lot of flavor. Whether it’s a party, a picnic, or just a Tuesday night dinner, this delectable dip is sure to elevate your culinary adventures! Perfecting Avocado Crema Cooking Process To make the most of your Avocado Crema, start by prepping the ingredients first. Once everything is chopped, blend your avocados and garlic with the sour cream or yogurt, lime juice, and seasonings until smooth. This sequence saves time and ensures a perfectly creamy texture. Add Your Touch to Avocado Crema Feel free to customize your Avocado Crema! Try substituting Greek yogurt for sour cream for a tangier kick, or add jalapeños for a spicy twist. Fresh herbs like dill or chives can add a unique flair too. Make it your own! Storing & Reheating Avocado Crema Store your Avocado Crema in an airtight container in the fridge for up to three days. To minimize browning, press a piece of plastic wrap directly onto the surface. Avoid reheating; this dish is best enjoyed cold or at room temperature. Sometimes, I whip up Avocado Crema for gatherings, and it never fails to impress. One time, a friend couldn’t stop raving about it, and I felt like a superstar chef for just a moment! FAQs About Avocado Crema What is Avocado Crema? Avocado Crema is a creamy, vibrant condiment that combines ripe avocados, sour cream or Greek yogurt, fresh lime juice, garlic, and seasonings. This delightful dip is perfect for tacos, burritos, or as a zesty spread on sandwiches. It offers a rich texture and a wonderful freshness that elevates any dish. The addition of cilantro or other herbs can enhance its flavor, making it a versatile addition to your culinary repertoire. With just a few simple ingredients, Avocado Crema turns ordinary meals into extraordinary experiences. How do you make Avocado Crema? Making Avocado Crema is incredibly simple and only takes about 10 minutes! Start by chopping ripe avocados and a garlic clove. Then, blend them together in a food processor with sour cream or Greek yogurt, fresh lime juice, and your choice of seasonings like salt and pepper. Blend until smooth, and taste to adjust the flavor. For a chilled dip, let it rest in the refrigerator for about 30 minutes. Your delicious Avocado Crema will be ready to wow your friends and family! Can I customize my Avocado Crema? Absolutely! One of the best things about Avocado Crema is its versatility. You can swap sour cream for Greek yogurt for extra tanginess, or mix in ingredients like jalapeños for a spicy kick. Fresh herbs like cilantro, dill, or chives can add a personal touch. You could even experiment with lime zest for an additional burst of citrus flavor. Feel free to play around with ingredients to create a version that suits your taste! How should I store leftover Avocado Crema? To keep your Avocado Crema fresh, store it in an airtight container in the fridge for up to three days. To prevent browning, gently press a piece of
Delicious Snack Platter Recipe with Chocolate and Garlic Hommus
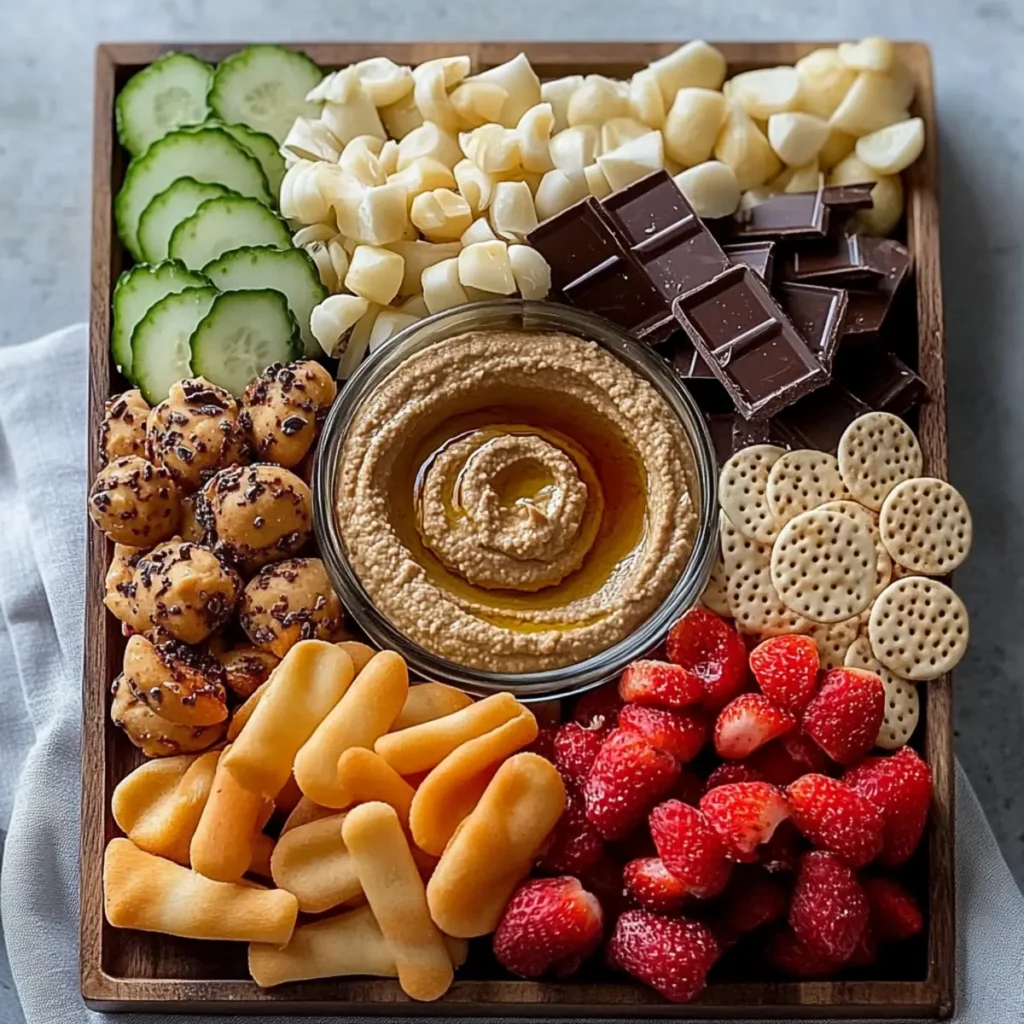
Indulging in a delicious snack platter recipe with chocolate and garlic hommus is like embracing a delightful combination of flavors that will make your taste buds dance. Picture the creaminess of velvety dark chocolate hommus mingling with the savory notes of garlic, all surrounded by a vibrant array of fresh fruits and crunchy snacks. It’s the perfect harmony of sweet and savory that beckons you to dive in. Whether you’re hosting a casual gathering or just want to treat yourself to something special during a cozy night in, this platter sets the stage for a culinary adventure that’s both fun and satisfying. Each bite is a new experience, a little explosion of flavors and textures that’ll leave you craving more. So, get ready to impress your friends and indulge in this delightful snack platter recipe that’ll make every occasion feel extraordinary. Ingredients for Delicious Snack Platter Recipe with Chocolate and Garlic Hommus Here’s what you’ll need to make this delicious Delicious Snack Platter Recipe with Chocolate and Garlic Hommus: 8 ounces Cedar’s Dark Chocolate Hommus – a creamy, rich treat that adds a luscious sweetness to your platter. 8 ounces Cedar’s Garlic Hommus – tangy, savory goodness that contrasts beautifully against the sweet chocolate. 1 cup pretzel thins – for that satisfying crunch, these are perfect for dipping and adding texture. 1/4 cup almonds – a healthy nut option that brings a delightful crunch and nutty flavor. 1 cup strawberries (sliced in half) – fresh, juicy strawberries add a pop of color and a sweet-tart bite. 2 English cucumbers (sliced) – crisp and refreshing, they balance out the richer flavors in the platter. 2 carrots (sliced) – their natural sweetness and crunch will please any veggie lover. 1 cup radishes (sliced) – these add a spicy kick and vibrant color to your snack spread. Not specified pirouette cookies – they are delicate treats offering a sweet contrast to the savory elements. Not specified crackers – choose your favorites to add more variety to your platter. How to Make Delicious Snack Platter Recipe with Chocolate and Garlic Hommus Follow these simple steps to prepare this delicious Delicious Snack Platter Recipe with Chocolate and Garlic Hommus: Step 1: Prepare Your Serving Board Grab a large serving tray or a charming wooden cutting board. This is where the magic happens, so choose something that really showcases your snacks. Step 2: Set the Base with Pretzels Arrange the pretzel thins down the middle of the tray like a delicious little road, splitting the tray into two sides. This will make it easier for everyone to navigate their way to the sweet and savory delights. Step 3: Add the Hommus Scoop the dark chocolate hommus onto one side of the tray and plop the garlic hommus onto the other. Make sure to create generous dollops to entice your guests – a good platter is all about the presentation! Step 4: Arrange the Savory Ingredients Surround the garlic hommus with the cucumbers, radishes, carrots, and almonds. Make it colorful and inviting, like nature painted on your plate. Step 5: Surround with Sweet Treats On the chocolate side, create a beautiful circle with strawberries and the pirouette cookies. Don’t be shy – the more, the merrier. Step 6: Final Touches and Serving Once everything is arranged beautifully, step back, admire your handiwork, and then invite your guests to dig in. Serve with some additional crackers if you feel generous, or just let them enjoy what they see. Now you have a stunning Delicious Snack Platter Recipe with Chocolate and Garlic Hommus that will impress anyone lucky enough to explore this feast. Whether it’s a quick movie night at home or a grand celebration with friends, this platter will definitely steal the show. Enjoy every tempting bite! This showstopping Delicious Snack Platter Recipe with Chocolate and Garlic Hommus delivers restaurant-quality results using simple ingredients you probably already have at home. The perfect balance of textures and flavors creates an unforgettable dining experience that will have everyone asking for seconds. Picture-perfect presentation with vibrant colors makes this dish absolutely Instagram-worthy and guaranteed to impress any dinner guest. Incredibly versatile recipe that works beautifully for weeknight dinners, meal prep, special occasions, or even outdoor entertaining sessions. Perfecting Delicious Snack Platter Recipe with Chocolate and Garlic Hommus Cooking Process Start by arranging your pretzel thins down the center of a large serving tray. Place the dark chocolate hummus on one side and the garlic hummus on the other. Finally, artfully arrange your vegetables and fruits around each hummus for a colorful, inviting display. Add Your Touch to Delicious Snack Platter Recipe with Chocolate and Garlic Hommus Feel free to customize this platter with whatever’s in your pantry. Switch up the almonds for walnuts, or toss in your favorite crackers for added crunch. You can even swap the cucumbers for baby carrots to change up the vibe entirely. Storing & Reheating Delicious Snack Platter Recipe with Chocolate and Garlic Hommus Store leftovers in an airtight container in the fridge for up to three days. For the best flavor and texture, enjoy the hummus cold. If needed, allow it to sit at room temperature for a few minutes before serving. Sometimes, I whip up this platter for game nights with friends, and their feedback never fails to lift my spirits. With every bite, they rave about the chocolate hummus and how it adds that unexpected zing! FAQs About Delicious Snack Platter Recipe with Chocolate and Garlic Hommus What is Delicious Snack Platter Recipe with Chocolate and Garlic Hommus? The Delicious Snack Platter Recipe with Chocolate and Garlic Hommus is a creative and visually appealing dish that combines sweet and savory elements. It features a pair of hummus dips—dark chocolate and garlic—served alongside a colorful array of vegetables, pretzels, almonds, and fresh fruit. This platter is perfect for gatherings, game nights, or simply as a fun snack for yourself. It’s an effortless way to impress guests with a delightful mix of flavors and