
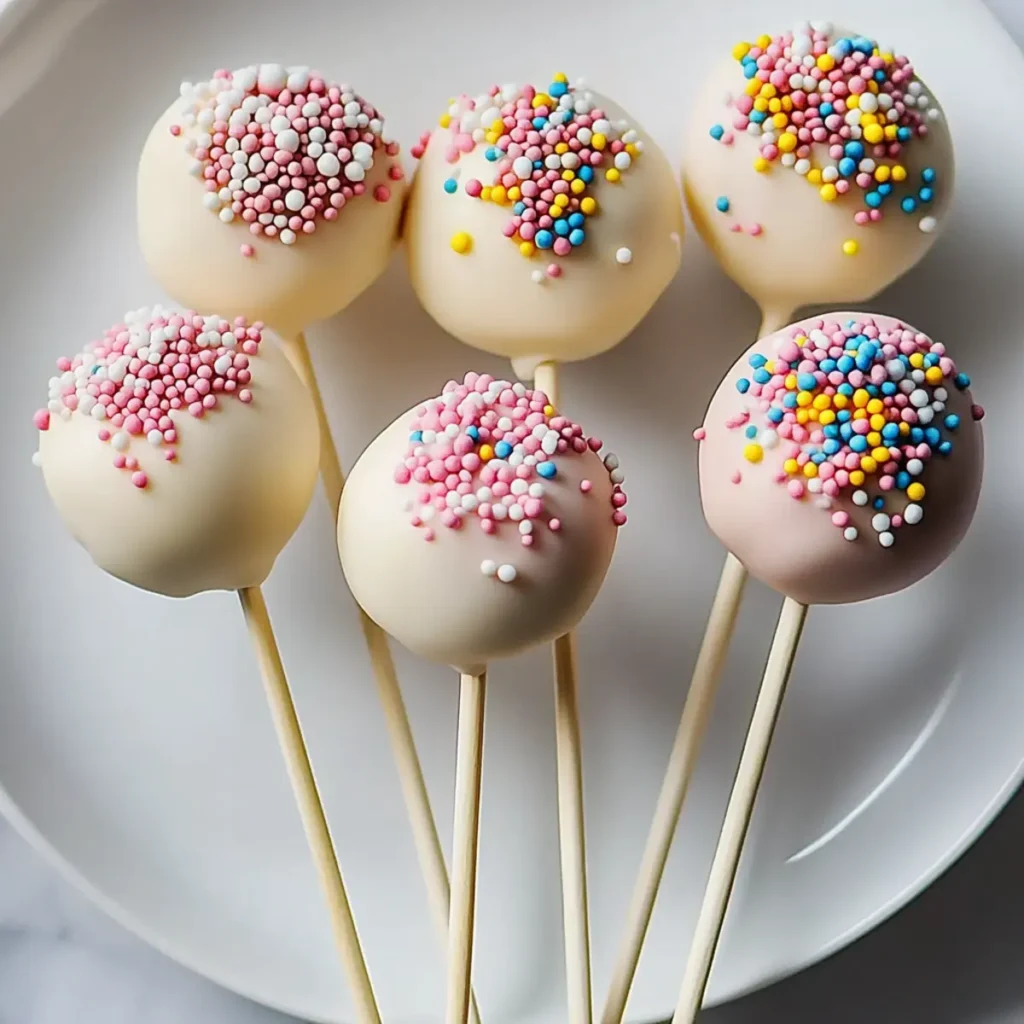
Imagine sinking your teeth into a sweet, chocolatey explosion that delivers both nostalgia and joy in every bite. This Summer Homemade Cake Pops recipe brings back memories of fun fairs, outdoor parties, and childhood delights, rolling them all into one delicious treat. The combination of fluffy vanilla cake mixed with creamy frosting, coated in smooth chocolate, and finished with a rainbow of sprinkles makes these cake pops a perfect companion for your sunny days.
Whether you’re hosting a summer barbecue, celebrating a birthday, or simply treating yourself after a long week, these cake pops promise to be a hit. Not only do they look delightful, but they also taste incredible. Prepare for the cheers as you present these bite-sized wonders that are sure to thrill your taste buds and create new memories.
Why You'll Love This Summer Homemade Cake Pops
- This incredible Summer Homemade Cake Pops transforms simple everyday ingredients into restaurant-quality flavors that will blow your mind completely.
- Foolproof recipe techniques guarantee perfect results every single time, making even novice cooks feel like professional chefs instantly.
- Stunning visual appeal with gorgeous colors and mouthwatering aromas creates the ultimate Instagram-worthy dish for any special occasion.
- Endlessly adaptable for different dietary needs while working beautifully for meal prep, date nights, or entertaining large groups effortlessly.
Ingredients for Summer Homemade Cake Pops
Here’s what you’ll need to make this delicious Summer Homemade Cake Pops:
1 box vanilla cake mix – the base of your cake pops; choose a quality brand for best flavor.
3 large eggs – these help bind your cake together; use room temperature eggs for better mixing.
1 cup water – will provide moisture to the batter, making the cake deliciously fluffy.
1/2 cup vegetable oil – adds richness and moisture, ensuring your cake remains soft.
2 cups chocolate melting wafers – for a smooth, chocolatey coating; choose your favorite variety, dark or milk chocolate.
1 cup sprinkles – perfect for adding a festive touch and crunch; feel free to use themed sprinkles for special occasions.
1 package cake pop sticks – essential for serving and displaying your cake pops.
How to Make Summer Homemade Cake Pops
Follow these simple steps to prepare this delicious Summer Homemade Cake Pops:
Step 1: Prepare the Cake Batter
Preheat your oven according to the cake mix package instructions. In a large bowl, combine the cake mix, eggs, water, and vegetable oil. Whisk together until smooth, and get ready to create some cake magic.
Step 2: Bake the Cake
Pour the batter into a greased baking dish or cupcake tins, and bake as directed until a toothpick inserted in the center comes out clean—around 25-30 minutes depending on your oven. Enjoy the heavenly aroma that fills your kitchen as your cake is baking!
Step 3: Crumble the Cake
Once the cake is completely cool (patience is key!), break it into chunks and transfer it into a large mixing bowl. Crumble it using your fingers until the texture resembles coarse crumbs—an activity that can double as stress relief!
Step 4: Mix with Frosting
Add a small scoop of frosting to the crumbled cake—about 1/4 cup will do. Mix with your hands until it holds together when pressed. This is like being a kid again, except you’re allowed to play with your food!
Step 5: Shape the Cake Pops
Form the mixture into small balls, about the size of a golf ball. Insert the cake pop stick gently into each ball, making sure they stay balanced. This step is where the magic starts to happen, transforming crumbled cake into delightful little treats.
Step 6: Chill the Cake Pops
Place your formed cake pops on a parchment-lined tray and refrigerate for approximately 30 minutes. This helps them firm up, so they hold their shape when dipped in chocolate.
Step 7: Melt the Chocolate
While the cake pops chill, melt the chocolate wafers according to the package instructions. You want it silky smooth, perfect for dipping! Keep an eye on it—nobody likes burnt chocolate!
Step 8: Dip and Decorate
Once the cake pops are firm, dip each one in the melted chocolate until fully coated. Let the excess chocolate drip off and immediately decorate with sprinkles before the chocolate sets. Let’s be honest, sprinkles make everything better!
Step 9: Set and Serve
Allow the decorated cake pops to harden at room temperature or pop them briefly in the fridge. Present them on a beautiful platter, and get ready for the oohs and aahs from your family and friends!
These Summer Homemade Cake Pops are not just a dessert; they are a gateway to happiness, laughter, and sweet memories. Whether you find yourself at a summer gathering, a birthday celebration, or simply indulging on a lazy afternoon, these little bites of joy are destined to be a crowd-pleaser. Get baking and enjoy!

You Must Know About Summer Homemade Cake Pops This showstopping Summer Homemade Cake Pops delivers restaurant-quality results using simple ingredients you probably already have at home. The perfect balance of textures and flavors creates an unforgettable dining experience that will have everyone asking for seconds. Picture-perfect presentation with vibrant colors makes this dish absolutely Instagram-worthy and guaranteed to impress any dinner guest. Incredibly versatile recipe that works beautifully for weeknight dinners, meal prep, special occasions, or even outdoor entertaining sessions.
Perfecting Summer Homemade Cake Pops Cooking Process
To achieve the best results, first bake the cake according to the box instructions while it cools. Once cooled, crumble the cake and mix with frosting to form the pops.
Add Your Touch to Summer Homemade Cake Pops
Feel free to experiment with different cake flavors, such as chocolate or red velvet. You can also use white chocolate instead of dark for dipping and enhance with flavored extracts like vanilla or almond.
Storing & Reheating Summer Homemade Cake Pops
Store your cake pops in an airtight container in the fridge for up to a week. For best taste, serve at room temperature and avoid reheating directly, as the chocolate coating may lose its texture.
Chef's Helpful Tips for Summer Homemade Cake Pops
- This professional-quality Summer Homemade Cake Pops relies on precise timing and temperature control to achieve restaurant-standard results consistently.
- Master the art of mise en place by prepping all ingredients beforehand, ensuring smooth execution and preventing any last-minute cooking disasters.
- The secret lies in layering flavors throughout the cooking process rather than seasoning only at the end for maximum depth.
- Pro tip: let the finished dish rest for optimal texture and flavor development before serving to hungry guests waiting eagerly.
It was a warm summer evening when I decided to whip up these cake pops for a neighborhood get-together, and nothing made me happier than seeing my friends dive into the vibrant treats, raving about how they were incredibly delicious and fun!
FAQs About Summer Homemade Cake Pops
What are Summer Homemade Cake Pops?
Summer Homemade Cake Pops are delightful bite-sized treats made by crumbling baked cake, mixing it with frosting, and then shaping it into balls. These treats are dipped in melted chocolate and decorated with colorful sprinkles, making them visually appealing and fun to eat. Perfect for parties, family gatherings, or just a sweet afternoon snack, these cake pops offer a fabulous way to enjoy cake in a new and exciting form. The simplicity of using a cake mix allows anyone to create these little joys with minimal fuss and maximum flavor.
How can I customize my Summer Homemade Cake Pops?
Customization is where the fun really begins with Summer Homemade Cake Pops! You can experiment with different flavors and colors to match the occasion. Swap the vanilla cake mix for chocolate, red velvet, or even lemon to bring some zest to your desserts. Consider using white chocolate for dipping instead of dark chocolate for a sweeter twist. Additionally, you can incorporate flavored extracts or add mini chocolate chips or nuts to the cake mixture. The options are endless—let your creativity shine!
What are some tips for making perfect Summer Homemade Cake Pops?
For perfecting your Summer Homemade Cake Pops, start by ensuring your cake is completely cool before crumbling. This will make it easier to blend with frosting without becoming too mushy. When shaping your pops, aim for uniform size to ensure even baking and chilling. Also, dip each cake pop stick into the melted chocolate before inserting it into the cake ball; this helps the stick stay in place. Finally, let the pops chill adequately to set the chocolate, creating a smooth, delectable shell.
Can Summer Homemade Cake Pops be stored, and how long do they last?
Yes, Summer Homemade Cake Pops can be stored effectively for later enjoyment. Place them in an airtight container and refrigerate for up to a week. For the best taste, serve them at room temperature—this enhances their flavor and texture. If you need to freeze them for longer storage, wrap the pops individually in plastic wrap, then place them in a freezer-safe container. They can last for up to three months in the freezer, though they are best enjoyed fresh!
Conclusion for Summer Homemade Cake Pops
Summer Homemade Cake Pops are a delicious and creative way to celebrate any occasion with a sweet, personal touch. By combining simple ingredients and a touch of creativity, you can whip up these delightful treats that are sure to impress family and friends. Whether customizing flavors, experimenting with different coatings, or simply enjoying the process, these cake pops offer endless potential for fun and flavor. So grab your favorite cake mix, and let the good times roll with delightful Summer Homemade Cake Pops!

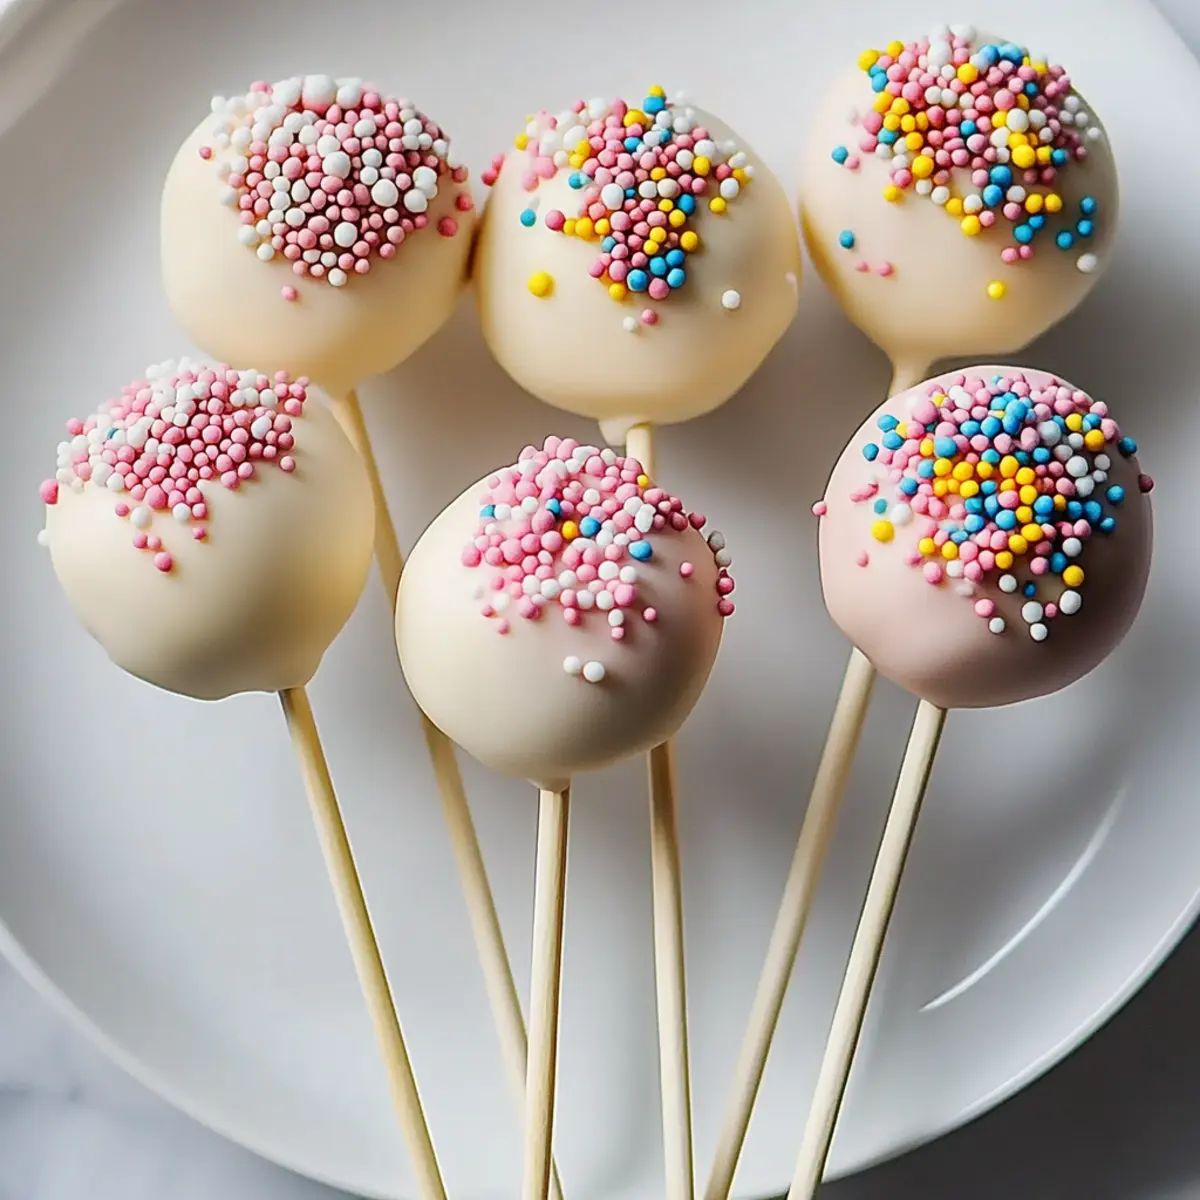
Summer Homemade Cake Pops
Ingredients
Equipment
Method
- Prepare the cake mix according to package instructions by combining the cake mix, eggs, water, and vegetable oil.
- Bake the cake as directed on the box until a toothpick inserted in the center comes out clean.
- Allow the cake to cool completely, then crumble it into a large bowl.
- Add a small amount of frosting to the crumbled cake and mix until it holds together when pressed.
- Form the mixture into small balls and insert a cake pop stick into each one.
- Refrigerate the cake pops for about 30 minutes to firm up.
- Melt the chocolate melting wafers according to package instructions.
- Dip each cake pop in the melted chocolate and decorate with sprinkles before the chocolate sets.
- Allow the decorated cake pops to harden at room temperature or refrigerate briefly.